In this section, you will learn how to upload videos and imagery that don’t have GPS metadata embedded in them.
Uploading Videos and Imagery
Uploading Videos
In this article, you will learn how to upload videos to your Ocumap account. It is important to note that to ensure the correctness of the viewing mode or viewing angle, you need to check the View Angle after uploading the video. The Equirectangular angle should be selected for videos that are taken flat.
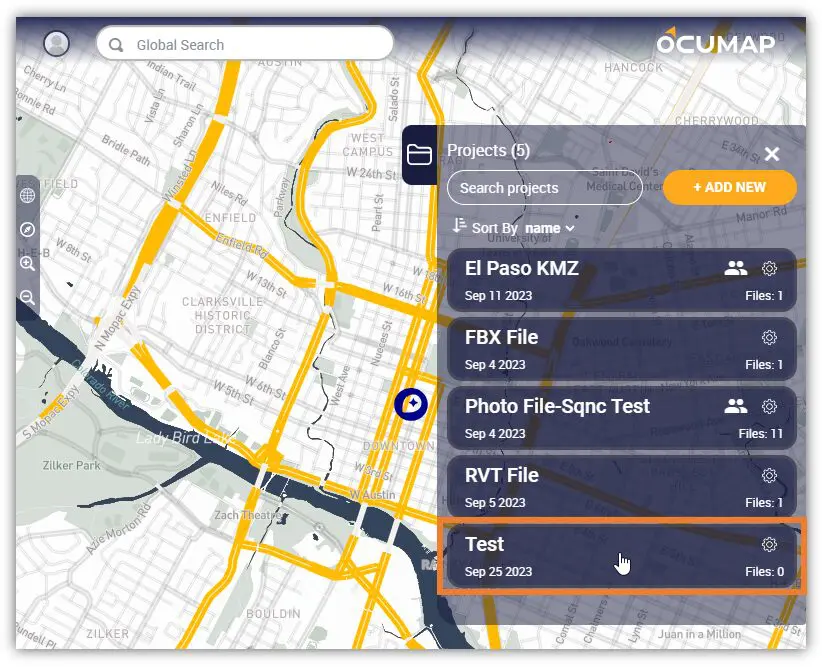
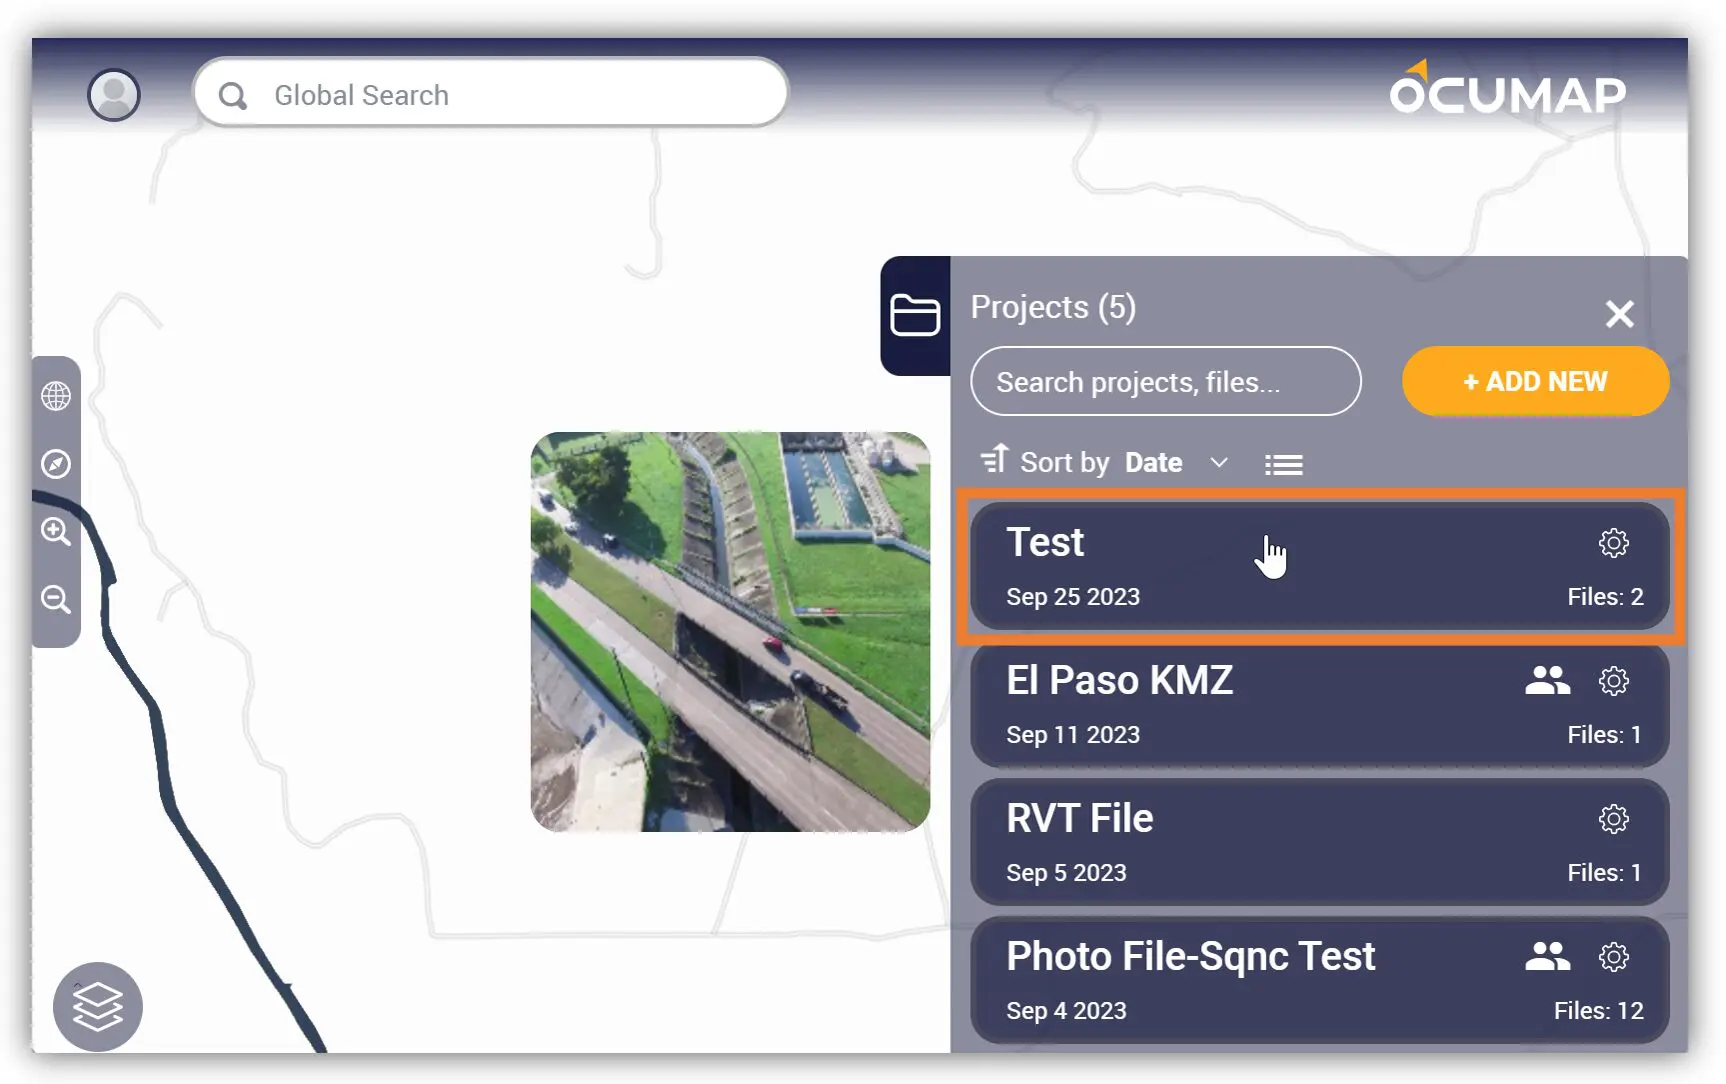
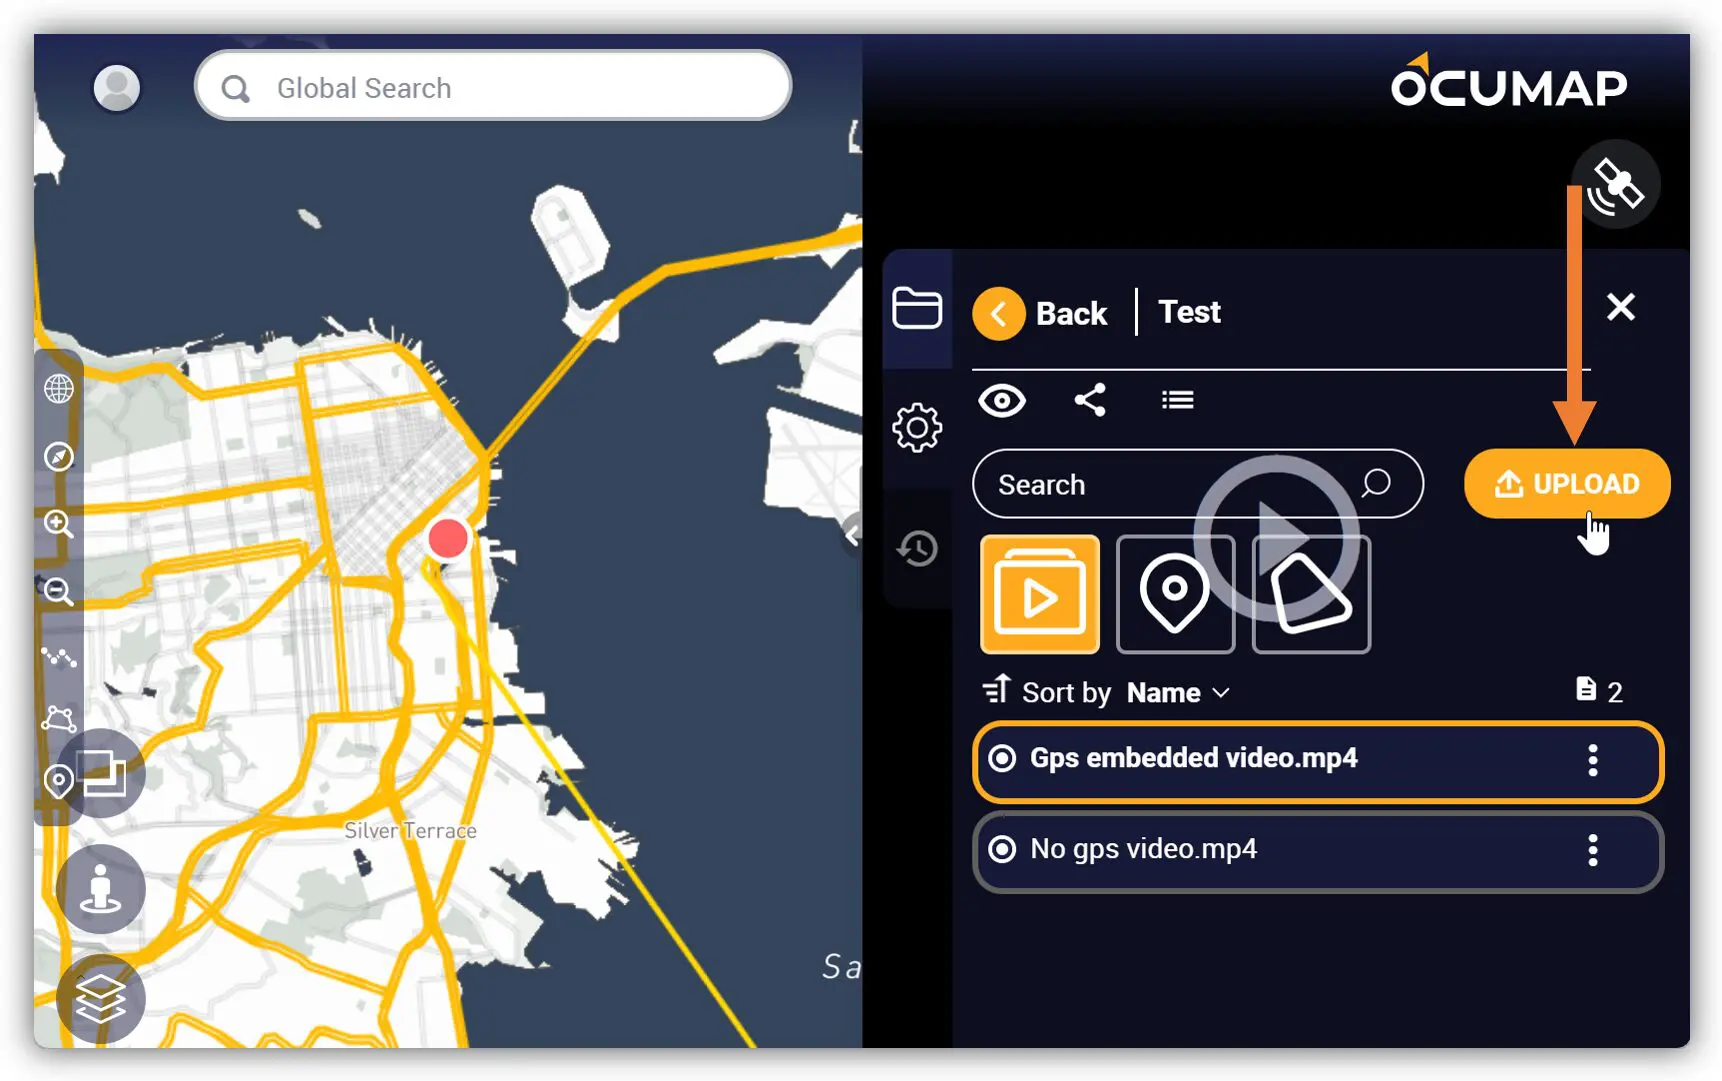
1. Open the Project where you want to add the video.
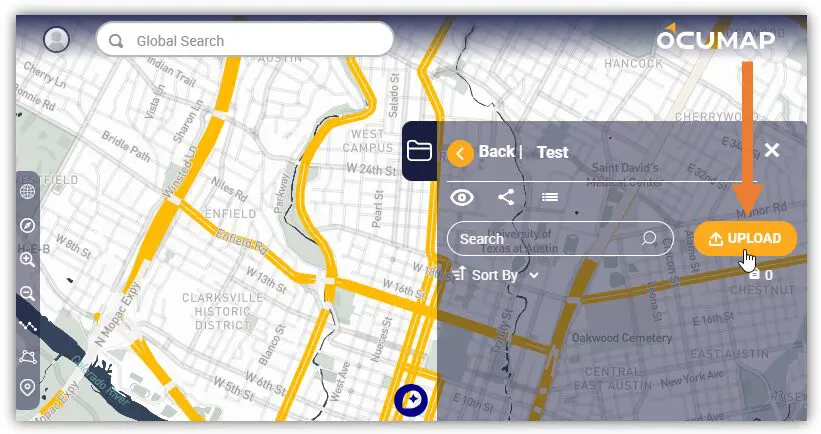
2. On the Project Menu, find and click the UPLOAD button.
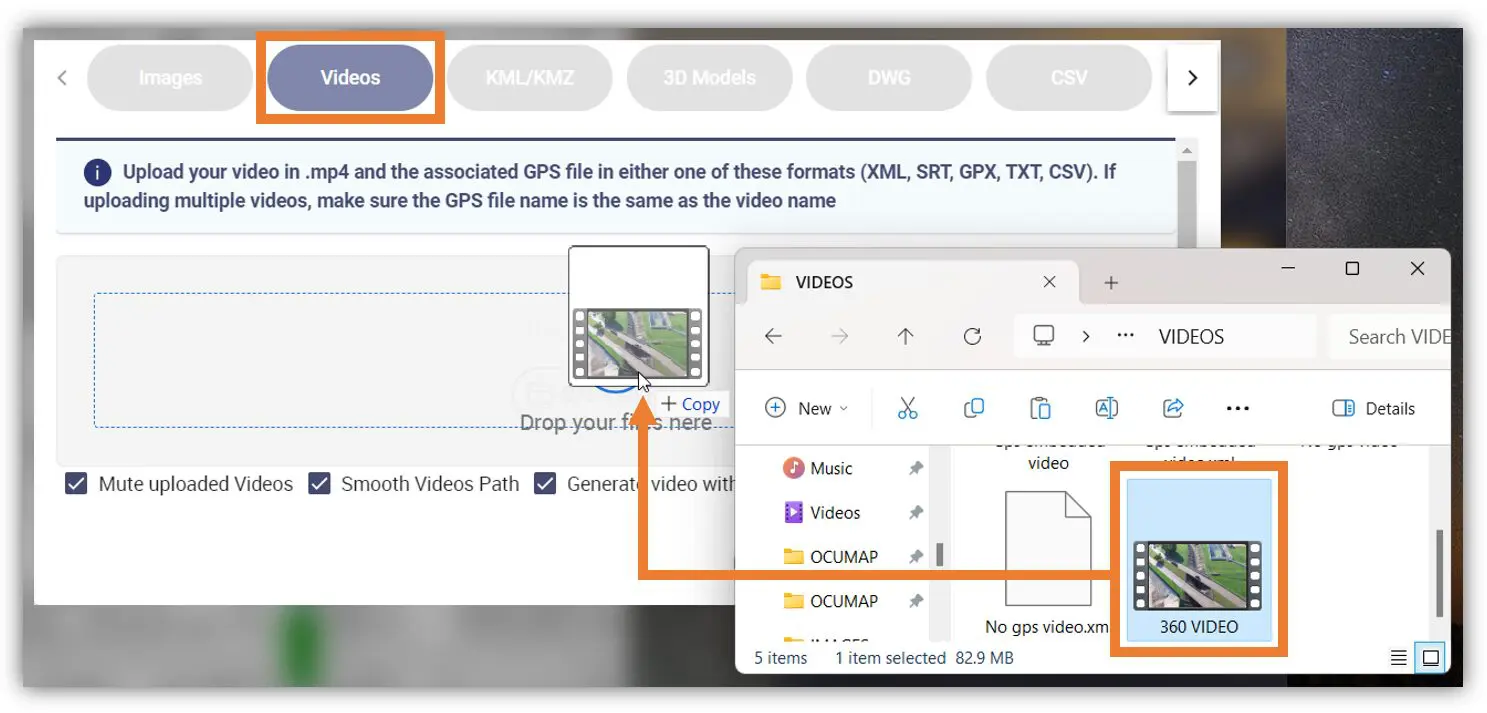
3. A window will appear, click the Videos tab.
4. You can use the Browse Files button to manually select the video file or you can Drag and Drop the video file(s) in the video section.
-
- Note: You can add multiple video files by dragging and dropping them in the video section.
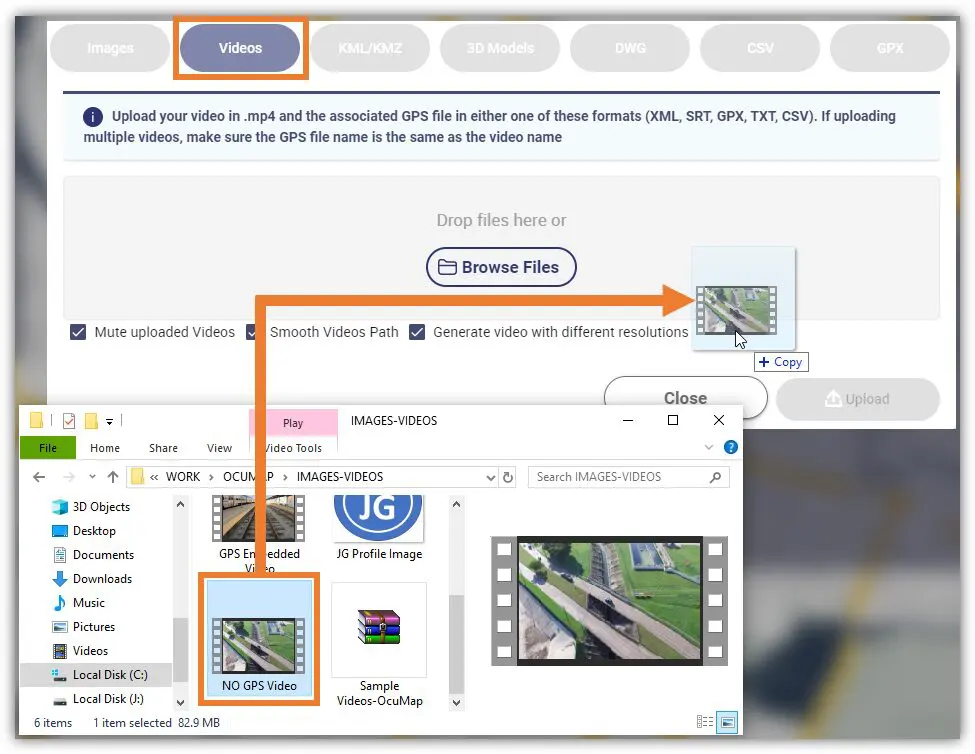
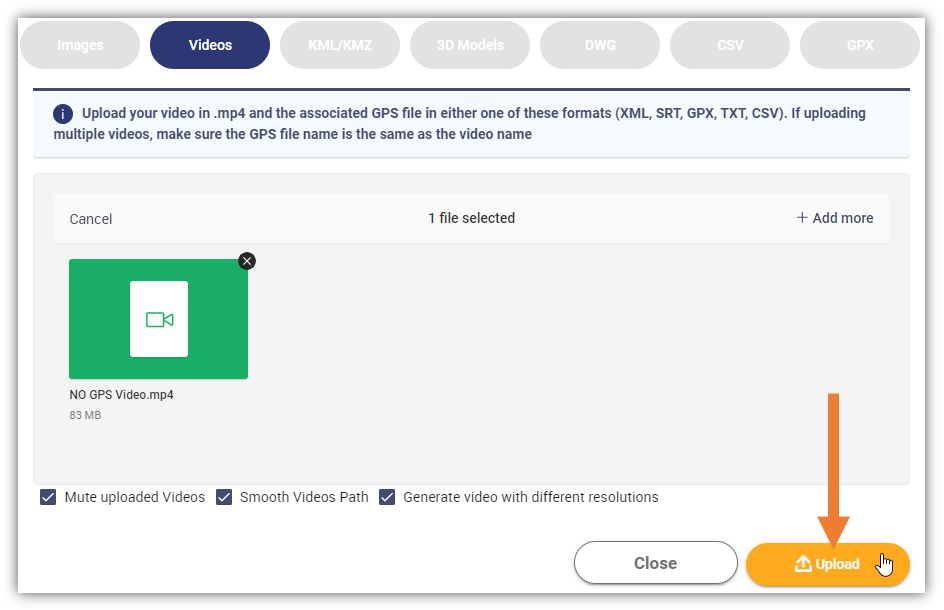
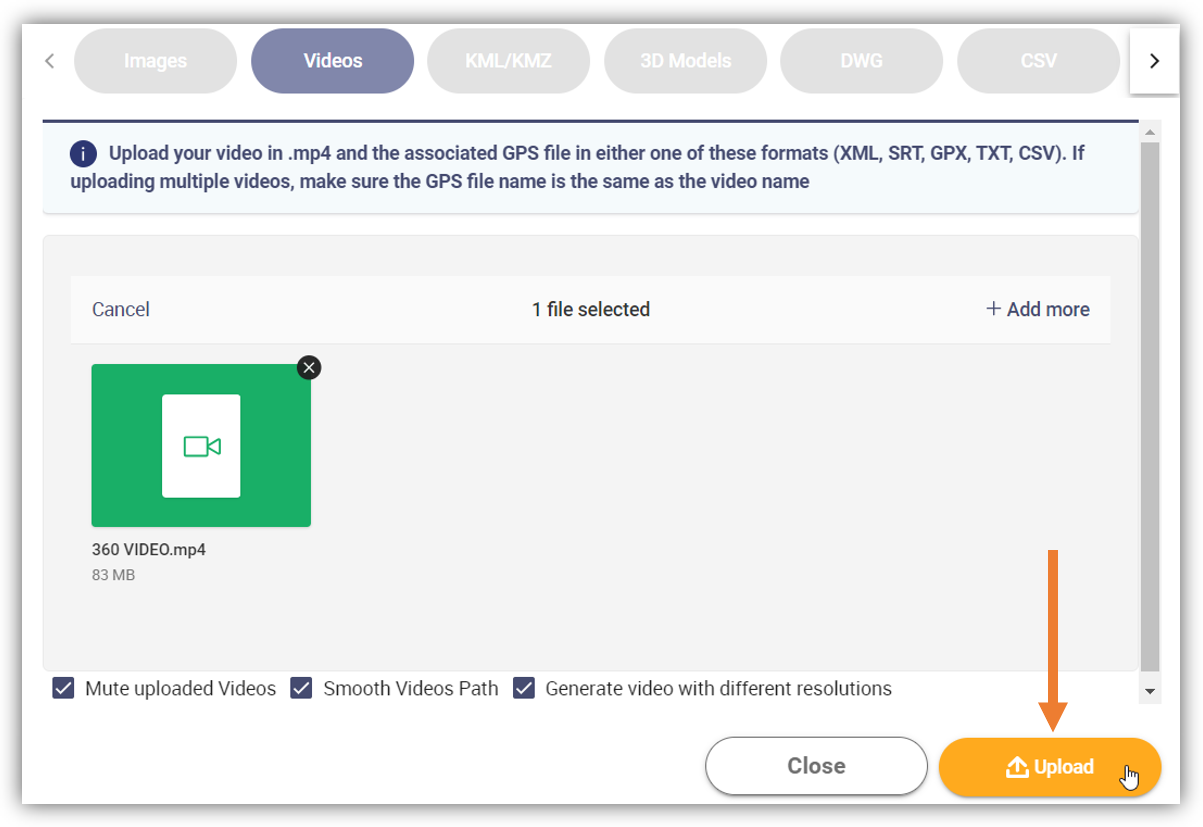
5. After uploading the video, you can configure the video settings by selecting/deselecting the following configuration:
-
- Mute uploaded Videos
- Smooth Videos Path. It is recommended to leave this option checked by default. It fixes anomalies in the collected GPS path.
- Generate video with different resolutions
6. Click the Upload button.
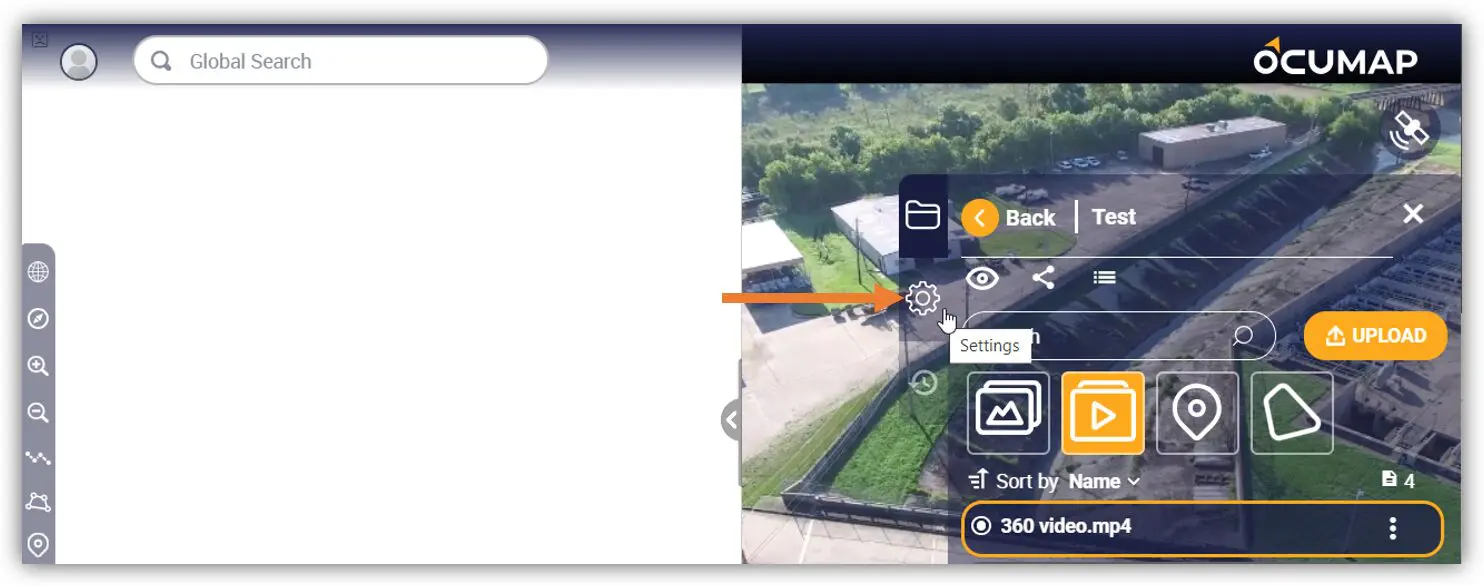
7. Once the video file(s) are uploaded, it will appear in the Viewer. Ensure that the Project View is appropriate to the uploaded file. For this example, we will use the Equirectangular project view.
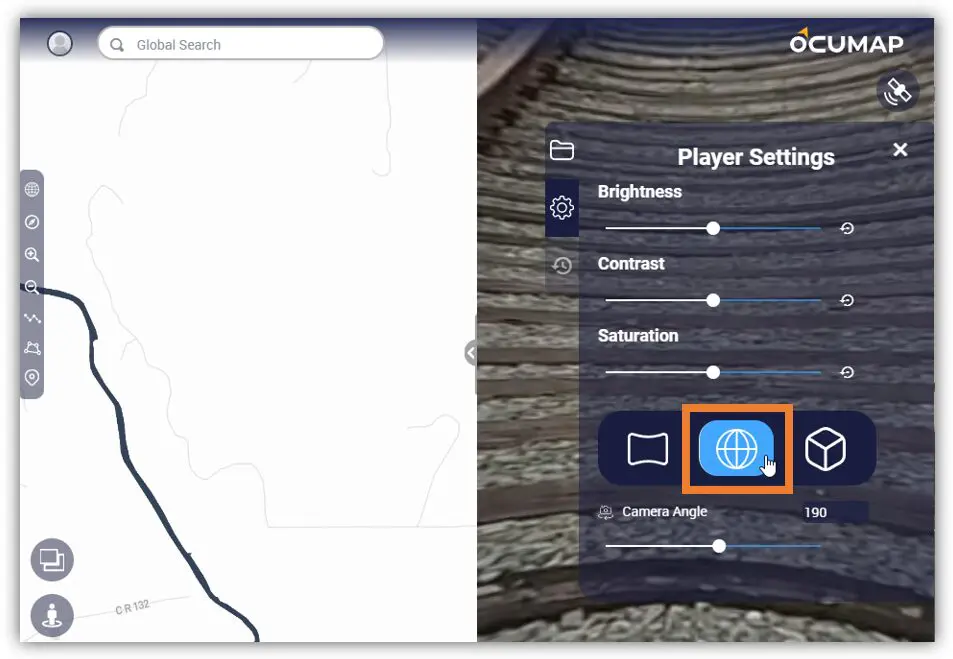
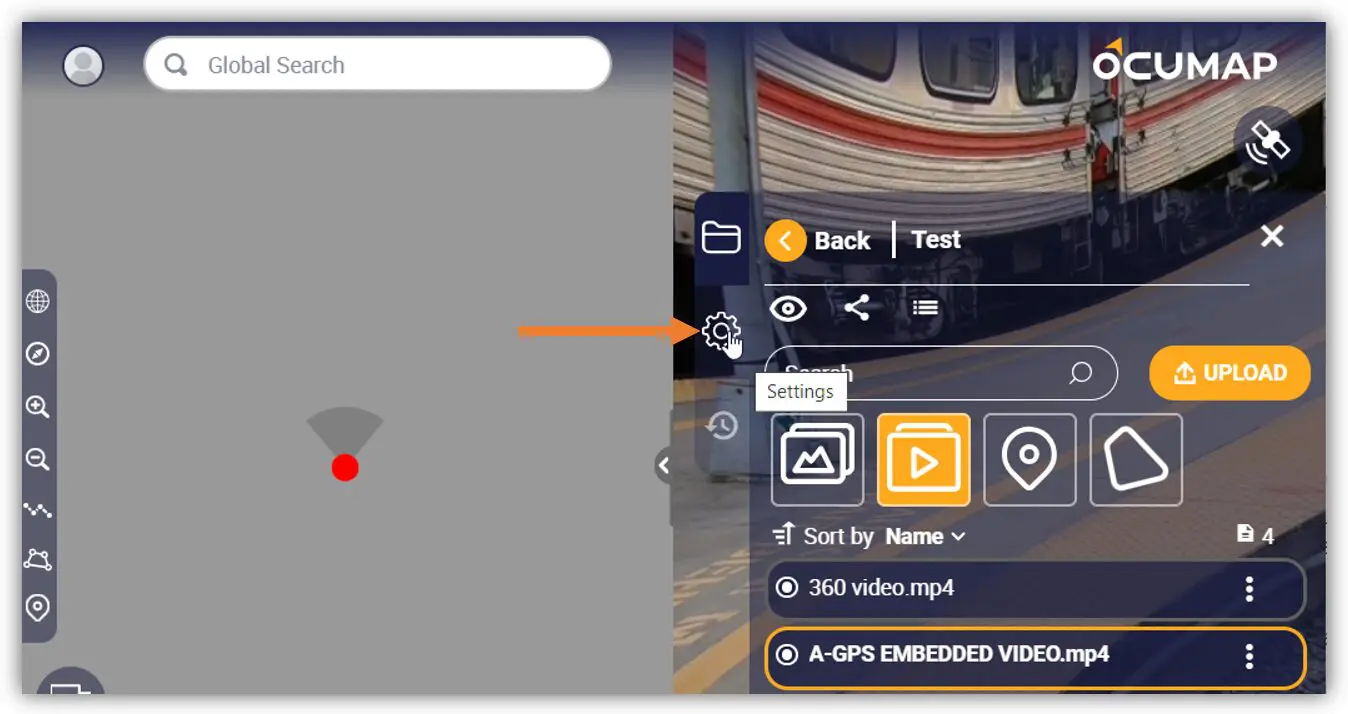
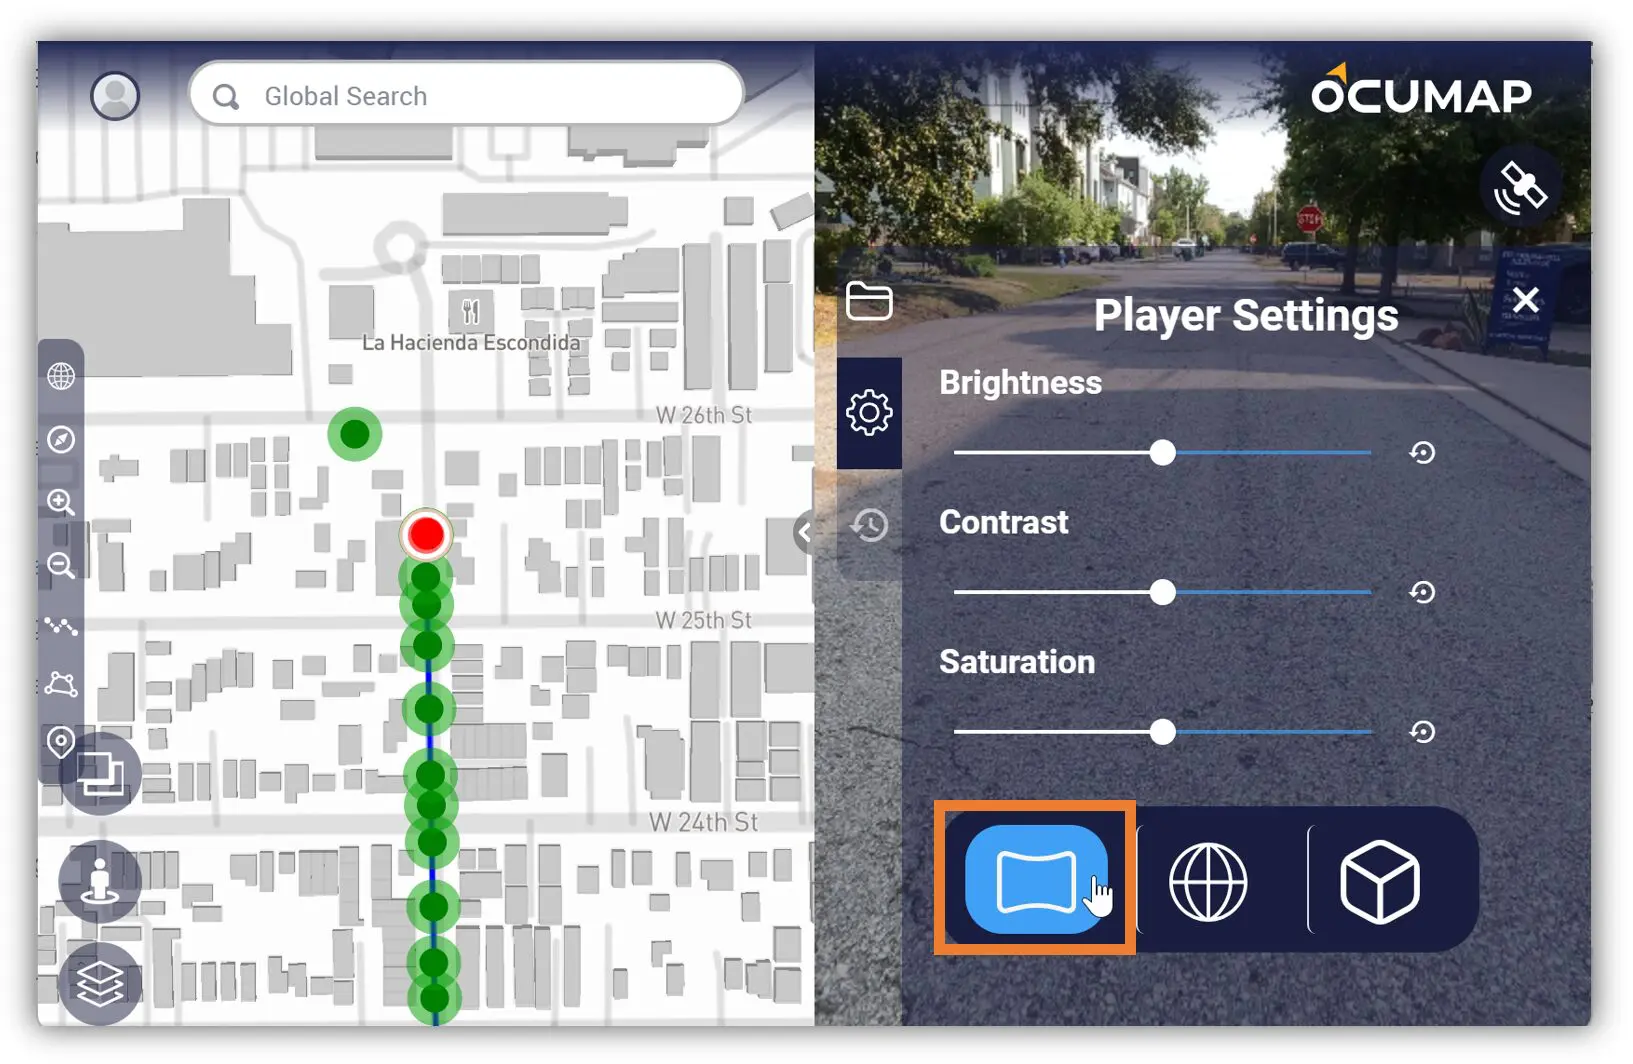
8. To set/update the project view, click the Settings tab.
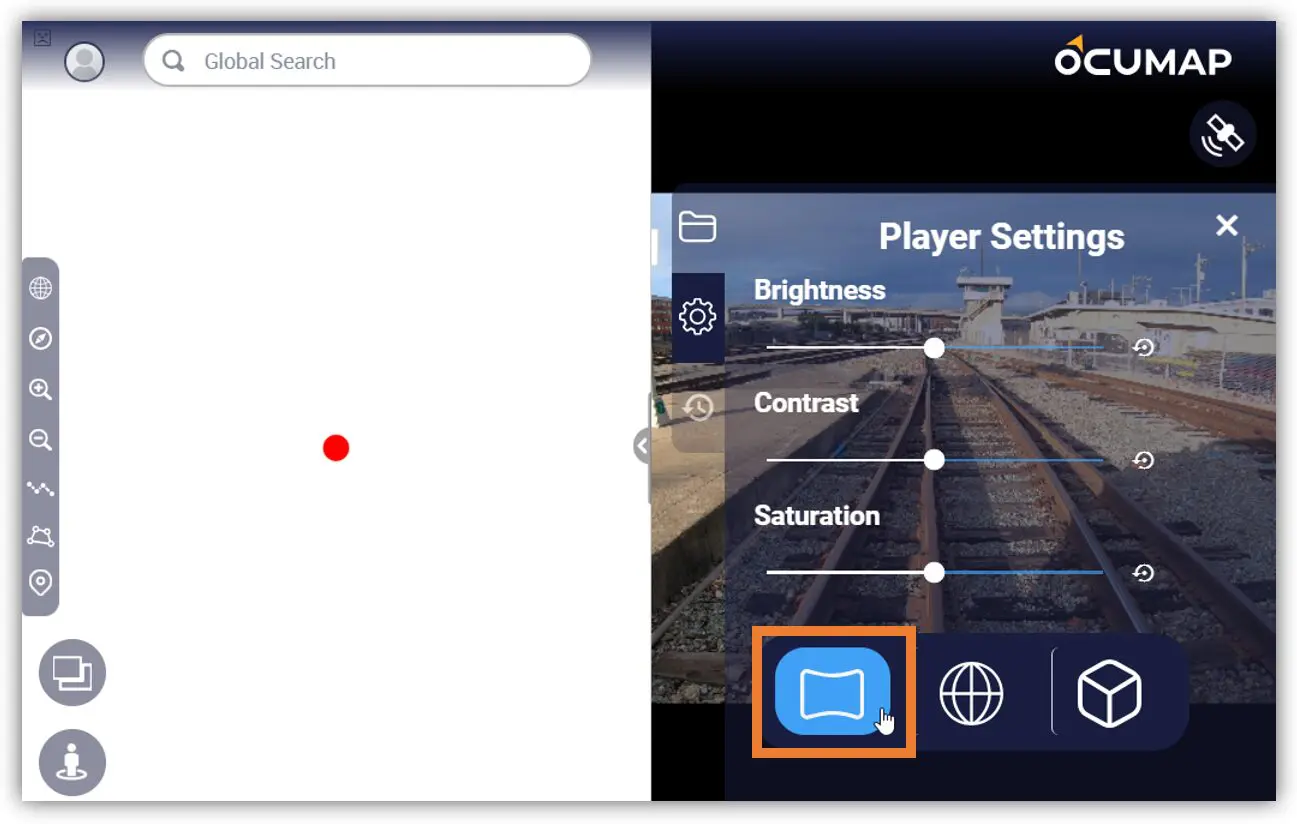
9. In the Project View section, select the Equirectangular icon. The settings will automatically be saved and updated in the project.
Uploading Panoramic (360 Degree) Videos
In this article, you will learn how to upload panoramic (360-degree) videos to your Ocumap account. It is important to note that to ensure the correctness of the viewing mode or viewing angle, you need to check the View Angle after uploading the video. The Spherical view should be selected for videos that are taken by a 360-degree camera.
1. Open the Project where you want to add the 360-degree video.
2. On the Project Menu, find and click the UPLOAD button.
3. The Upload File window will appear, ensure that you are in the Videos tab before uploading the image(s).
4. You can use the Browse Files button to manually select the video file or Drag and Drop the video file(s) in the Video section.
-
- Note: You can add multiple video file(s) by dragging and dropping them in the video section.
5. After uploading the video, you can configure the video settings by selecting/deselecting the following configuration:
-
- Mute uploaded Videos
- Smooth Videos Path
- Generate video with different resolutions
6. Click the Upload button.
7. Once the video file(s) are uploaded, it will appear in the Viewer. Ensure that the Project View is appropriate to the uploaded file. For this example, we will use the Spherical project view.
8. To set/update the project view, click the Settings tab.
9. In the Project View section, select the Spherical icon. The settings will automatically be saved and updated in the project.
Uploading Imagery
In this article, you will learn how to upload images in JPEG format. It is important to note that to ensure the correctness of the viewing mode or viewing angle, you need to check the View Angle after uploading the image. The Equirectangular angle should be selected for images that are taken flat.
1. Open the Project where you want to add the image.
2. On the Project Menu, find and click the UPLOAD button.
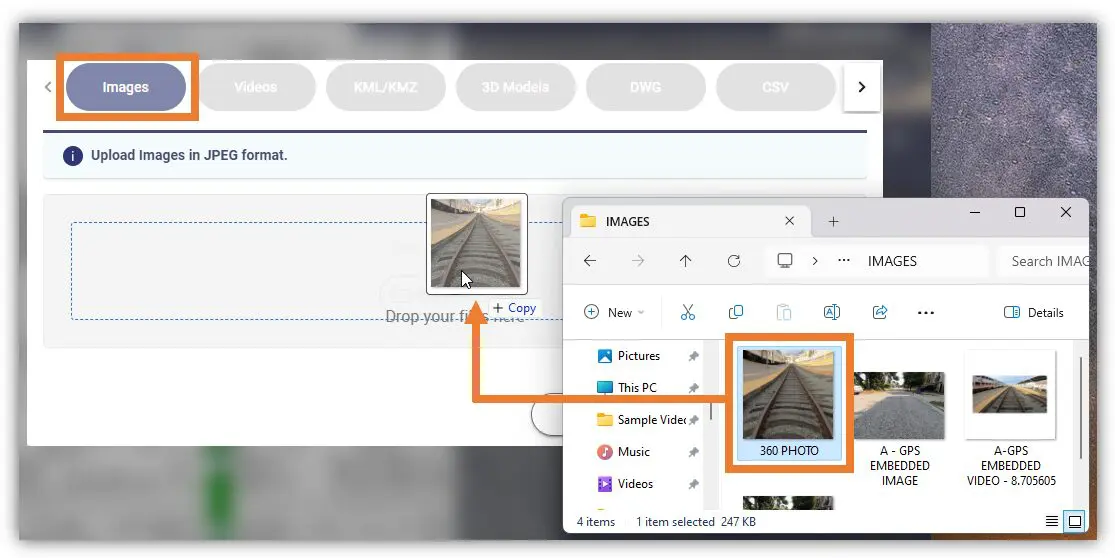
3. A window will appear, ensure that you are in the Images tab before uploading the image.
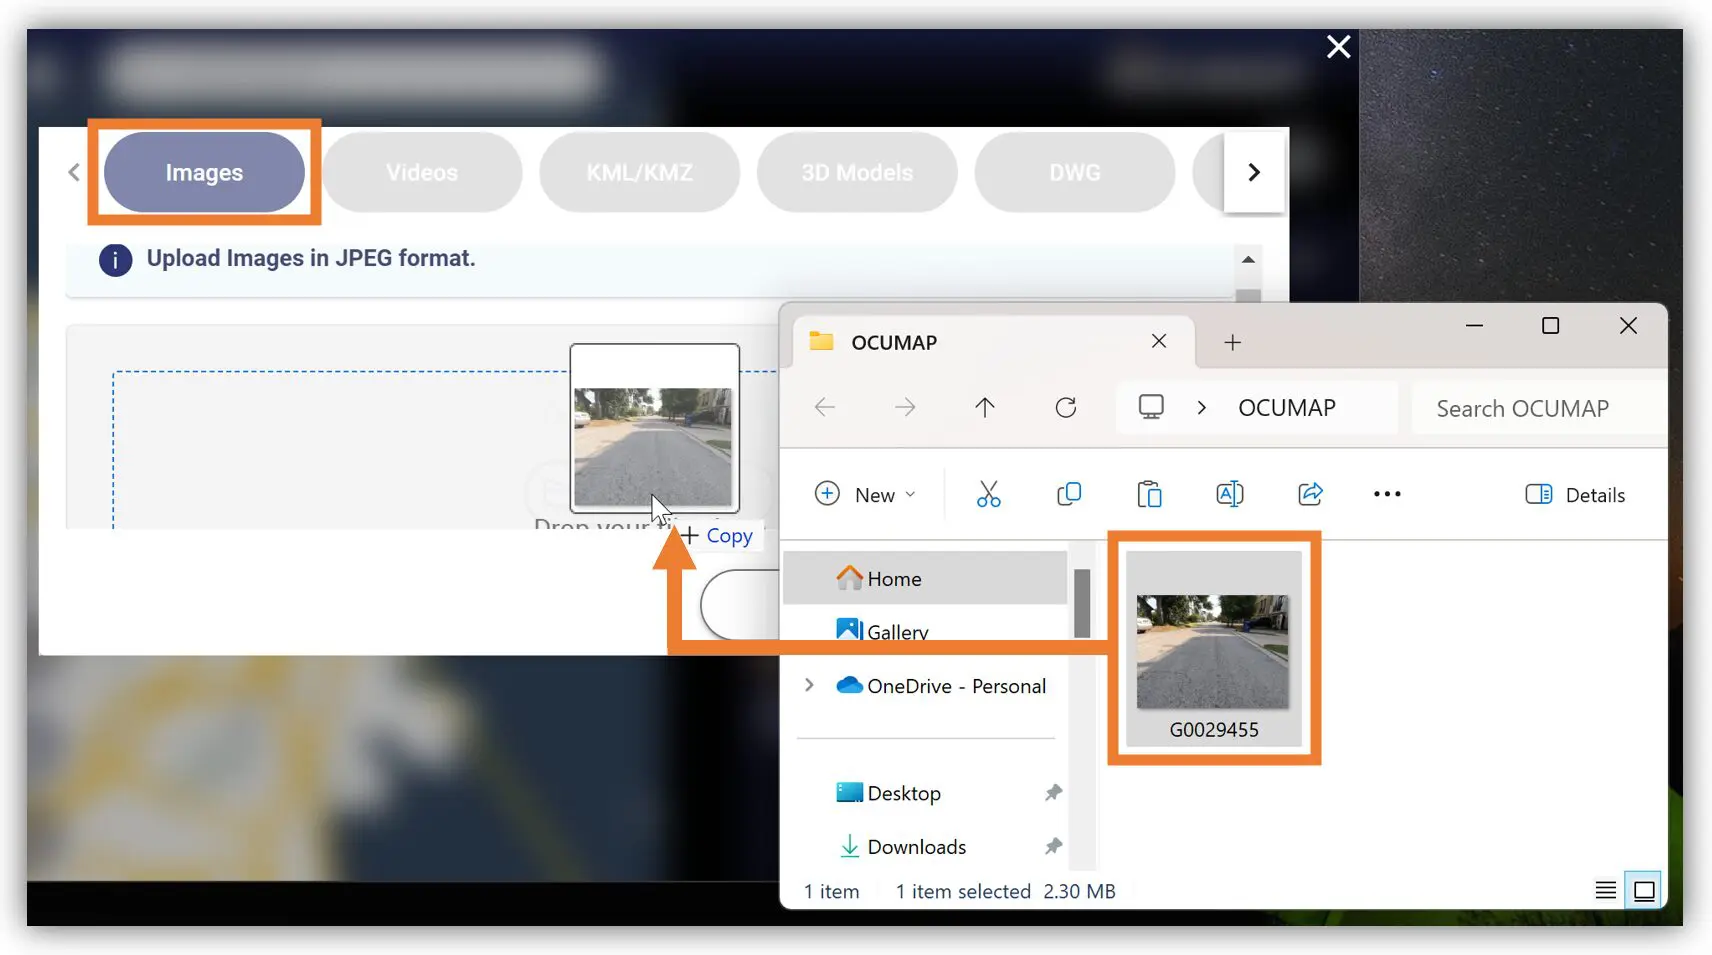 4. You can use the Browse Files button to manually select the image file or you can Drag and Drop the image file(s) in the Image section.
-
- Note: You can add multiple image files by dragging and dropping them in the image section.
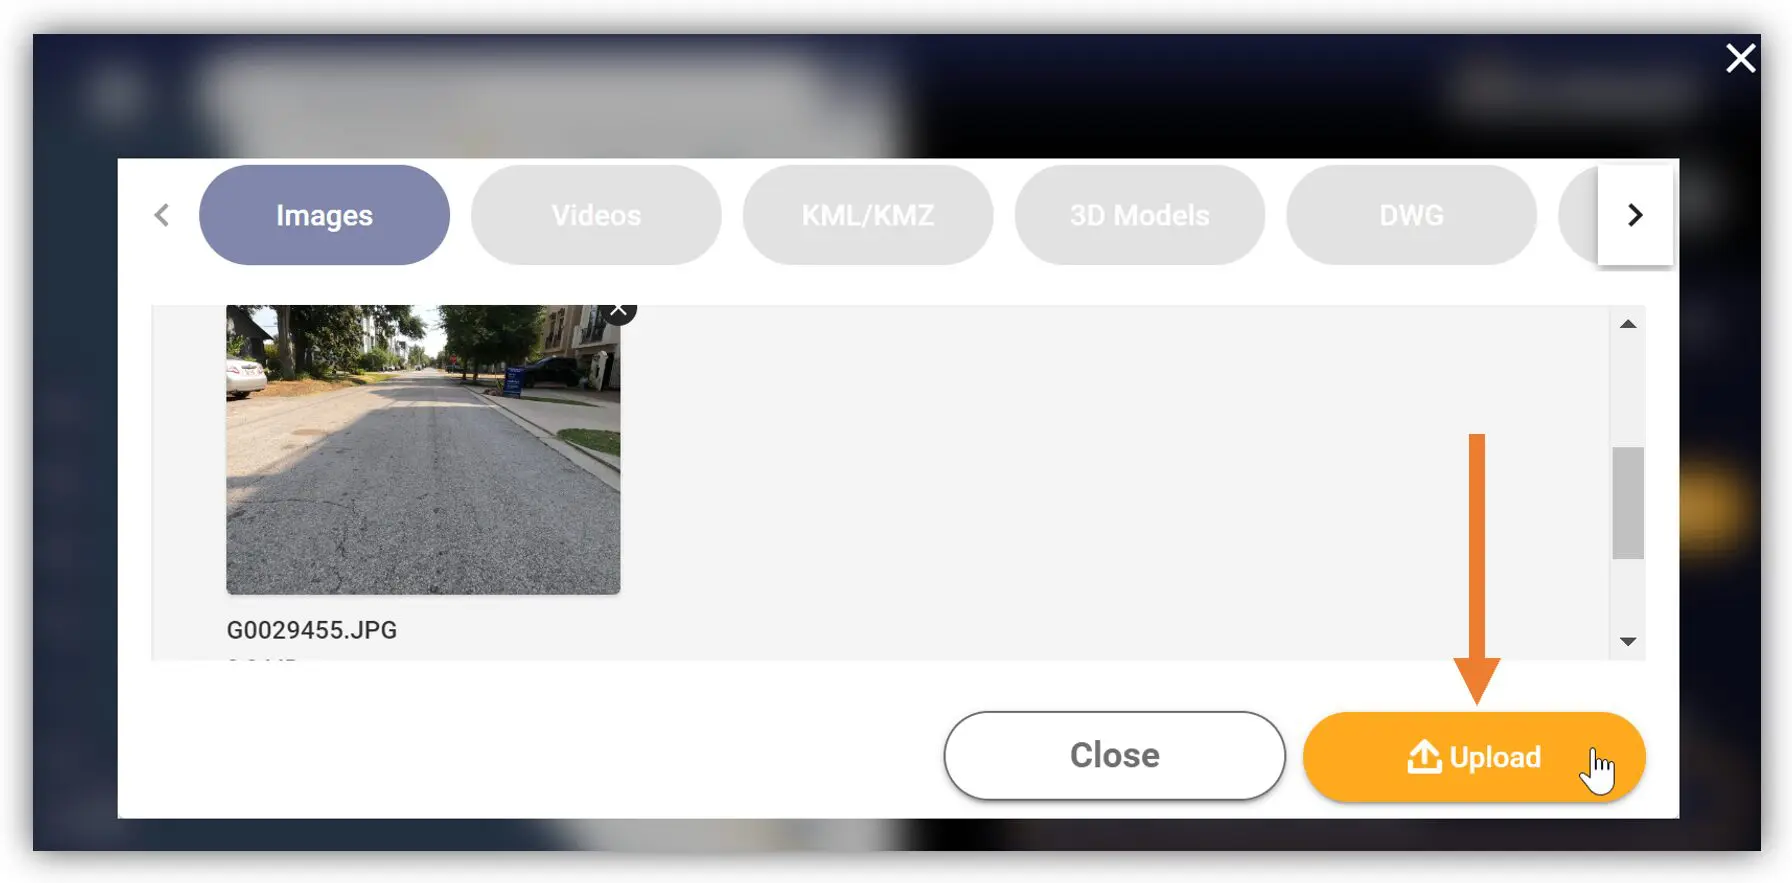
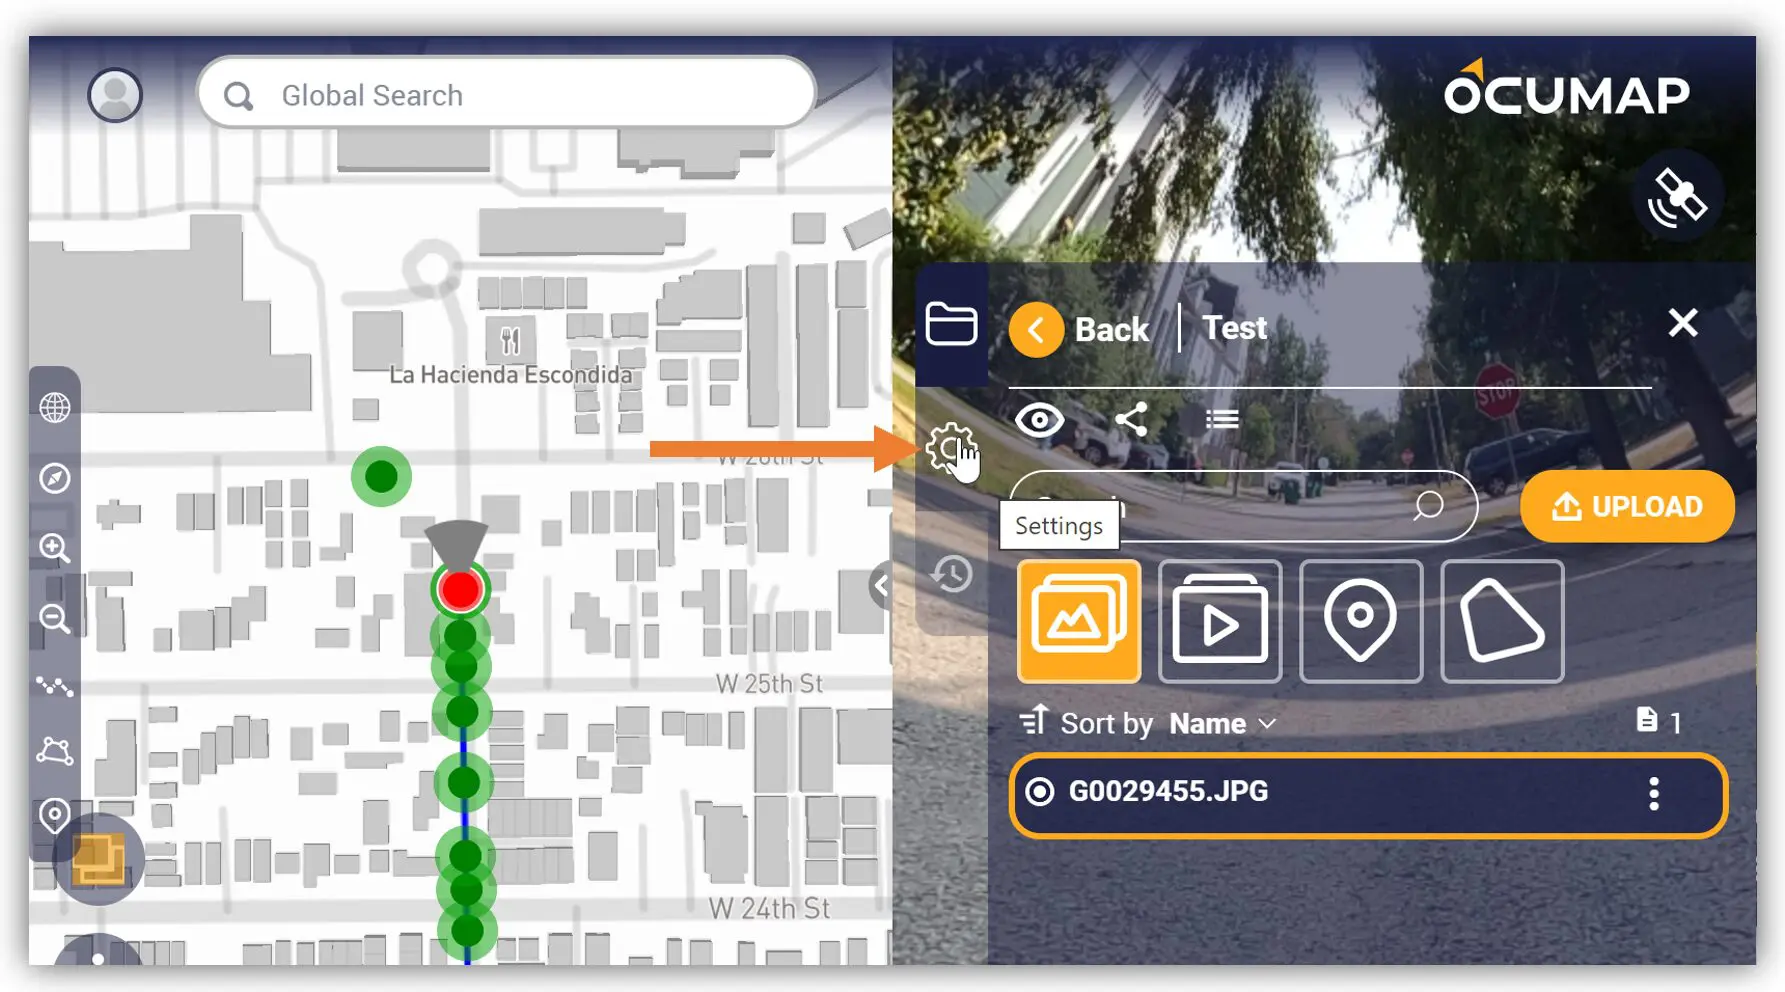
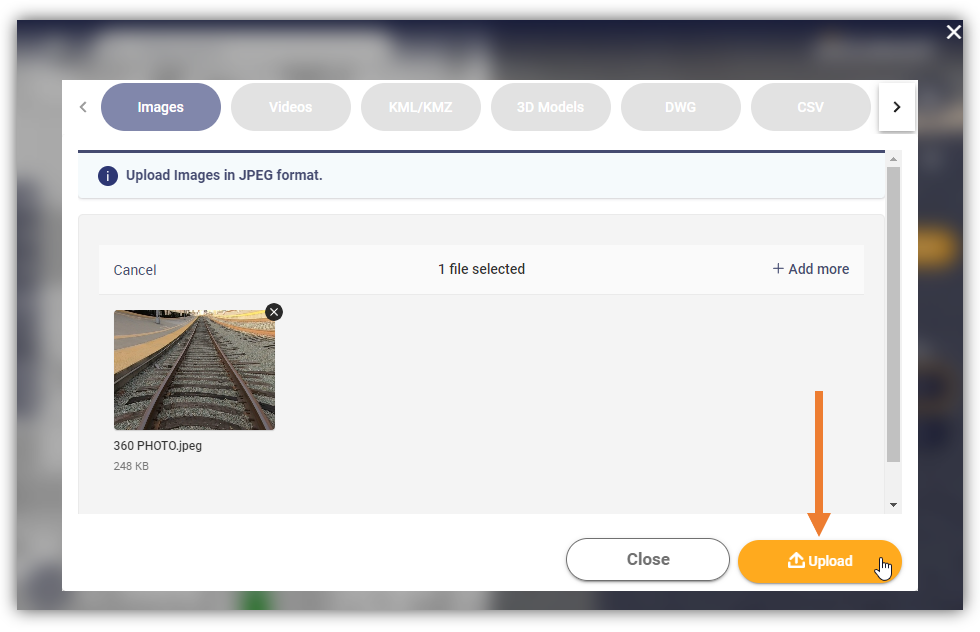
5. After adding the image file(s), click the Upload button. Once the image file(s) are uploaded, it will appear in the Viewer. Ensure that the Project View is appropriate to the uploaded file. In this case, for imagery, the project view should be Equirectangular.
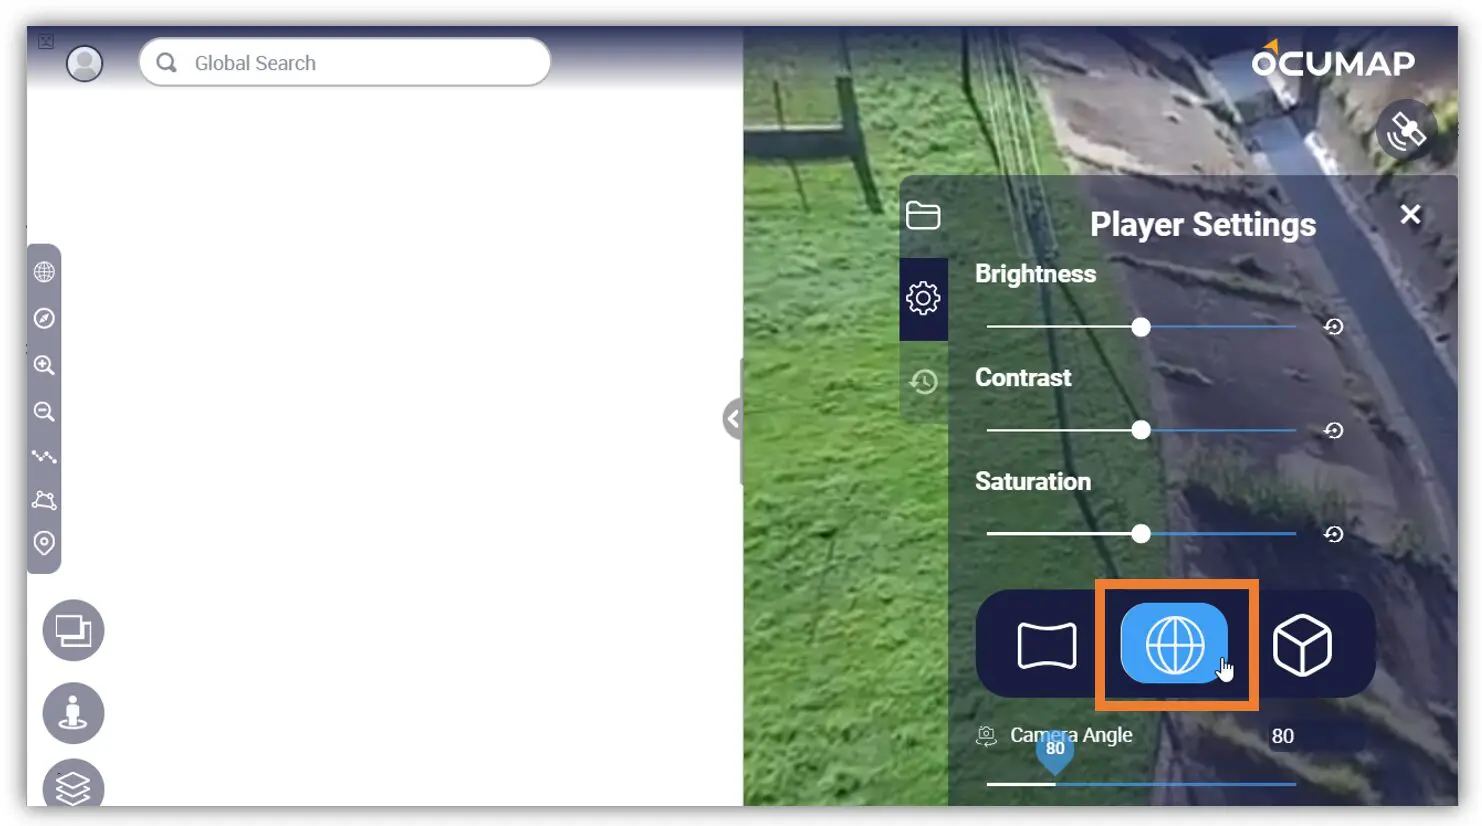
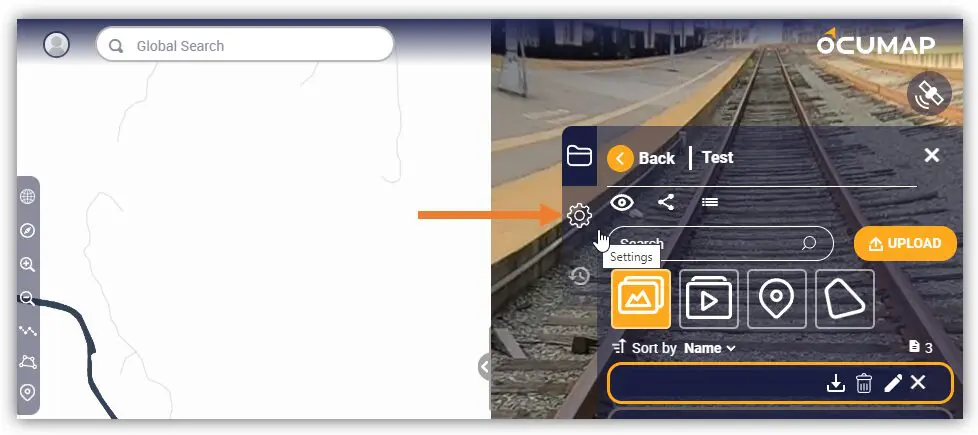
6. To set/update the project view, click the Settings tab.
-
- Note: if you look at the image, it does not look right and stretched out. This means that the project view is either not set or incorrect.
7. In the Project View section, select the Equirectangular icon. The settings will automatically be saved and updated in the project.
Uploading Panoramic (360-degree) Imagery
In this article, you will learn how to upload panoramic (360-degree) images in JPEG format. It is important to note that to ensure the correctness of the viewing mode or viewing angle, you need to check the View Angle after uploading the image. The Spherical view should be selected for images that are taken by a 360-degree camera.
1. Open the Project where you want to add the panoramic (360-degree) image.
2. On the Project Menu, find and click the UPLOAD button.
3. The Upload File window will appear, ensure that you are in the Images tab before uploading the image(s).
4. You can use the Browse Files button to manually select the image file or Drag and Drop the image file(s) in the Image section.
-
- Note: You can add multiple image file(s) by dragging and dropping them in the image section.
5. After adding the image file(s) click the Upload button. Once the image file(s) are uploaded, it will appear in the Viewer. Ensure that the Project View is appropriate to the uploaded file. In this case, for panoramic (360) imagery, the project view should be Spherical.
6. To set/update the project view, click the Settings tab.
7. In the Project View section, select the Spherical icon. The settings will automatically be saved and updated in the project.