Uploading Videos and Imagery with GPS
Uploading Videos with GPS
In this article, you will learn how to upload GPS-embedded videos.
1. Open the Project where you want to add the video with embedded GPS Metadata.
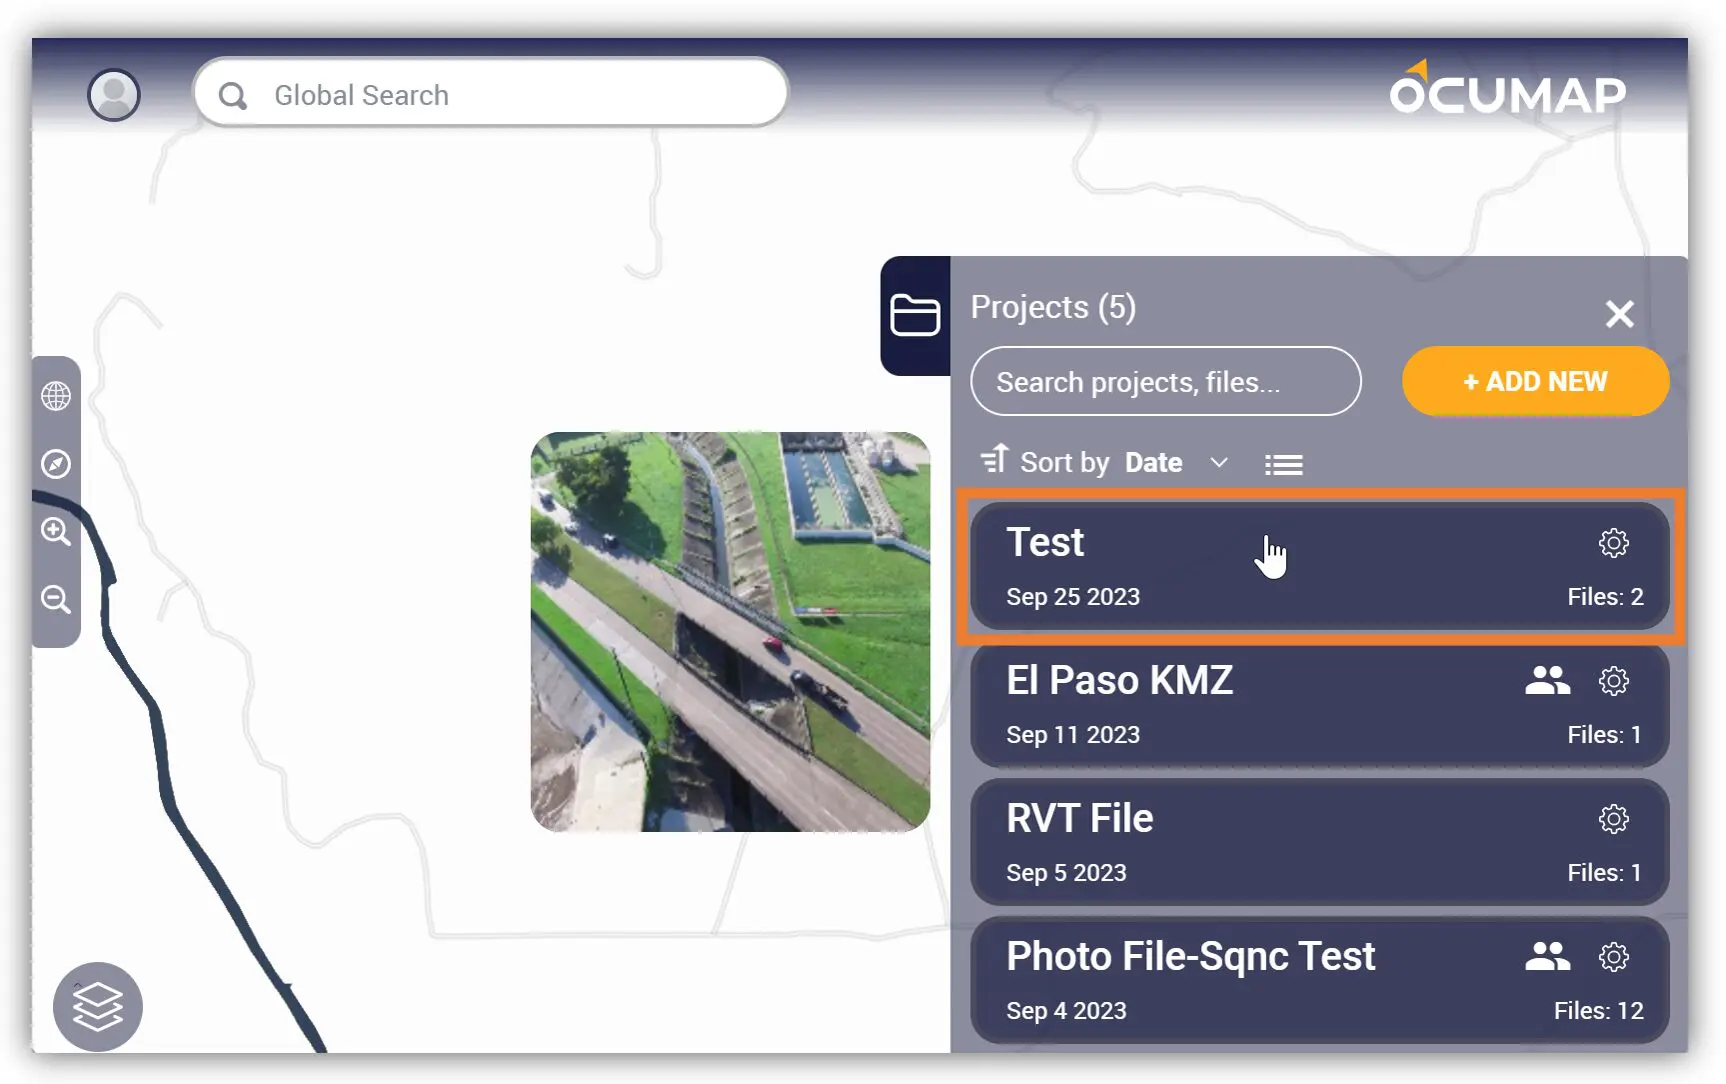
2. On the Project Menu, find and click the UPLOAD button.

3. The Upload Files window will appear. Click the Videos tab.
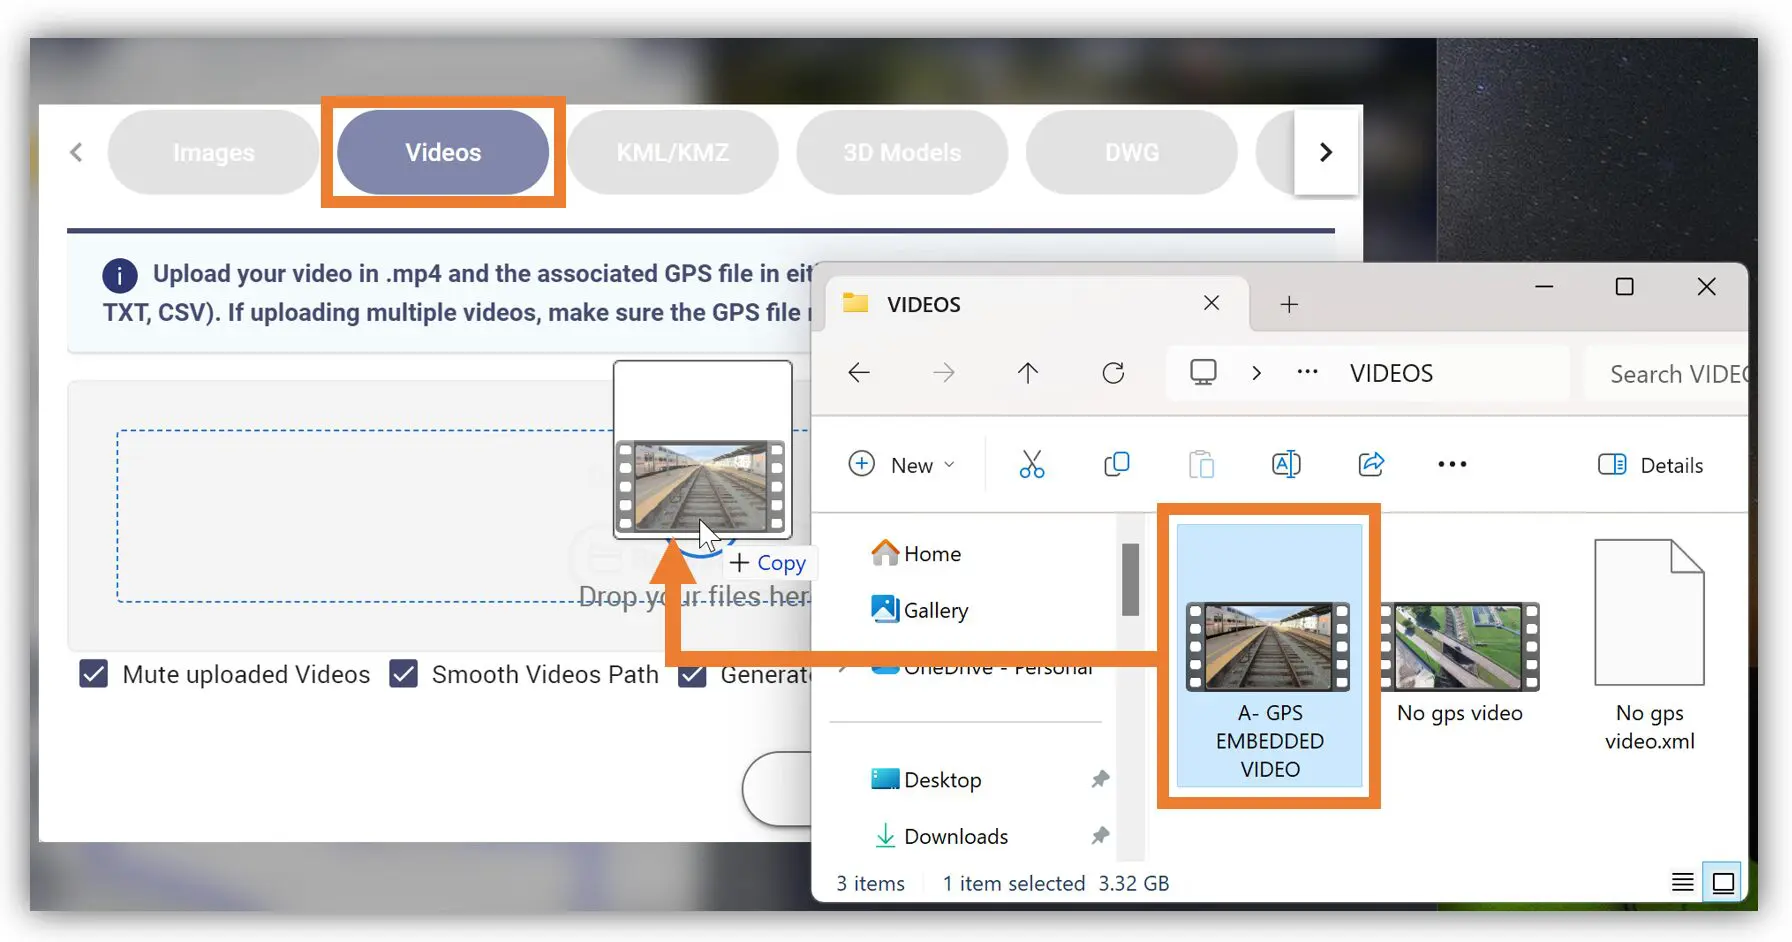
4. You can use the Browse Files button to manually select the mp4 video file with the associated GPX or SRT file or Drag and Drop the video file(s) in the Videos section.
-
- Note: You can add multiple video file(s) by dragging and dropping them in the Videos section.
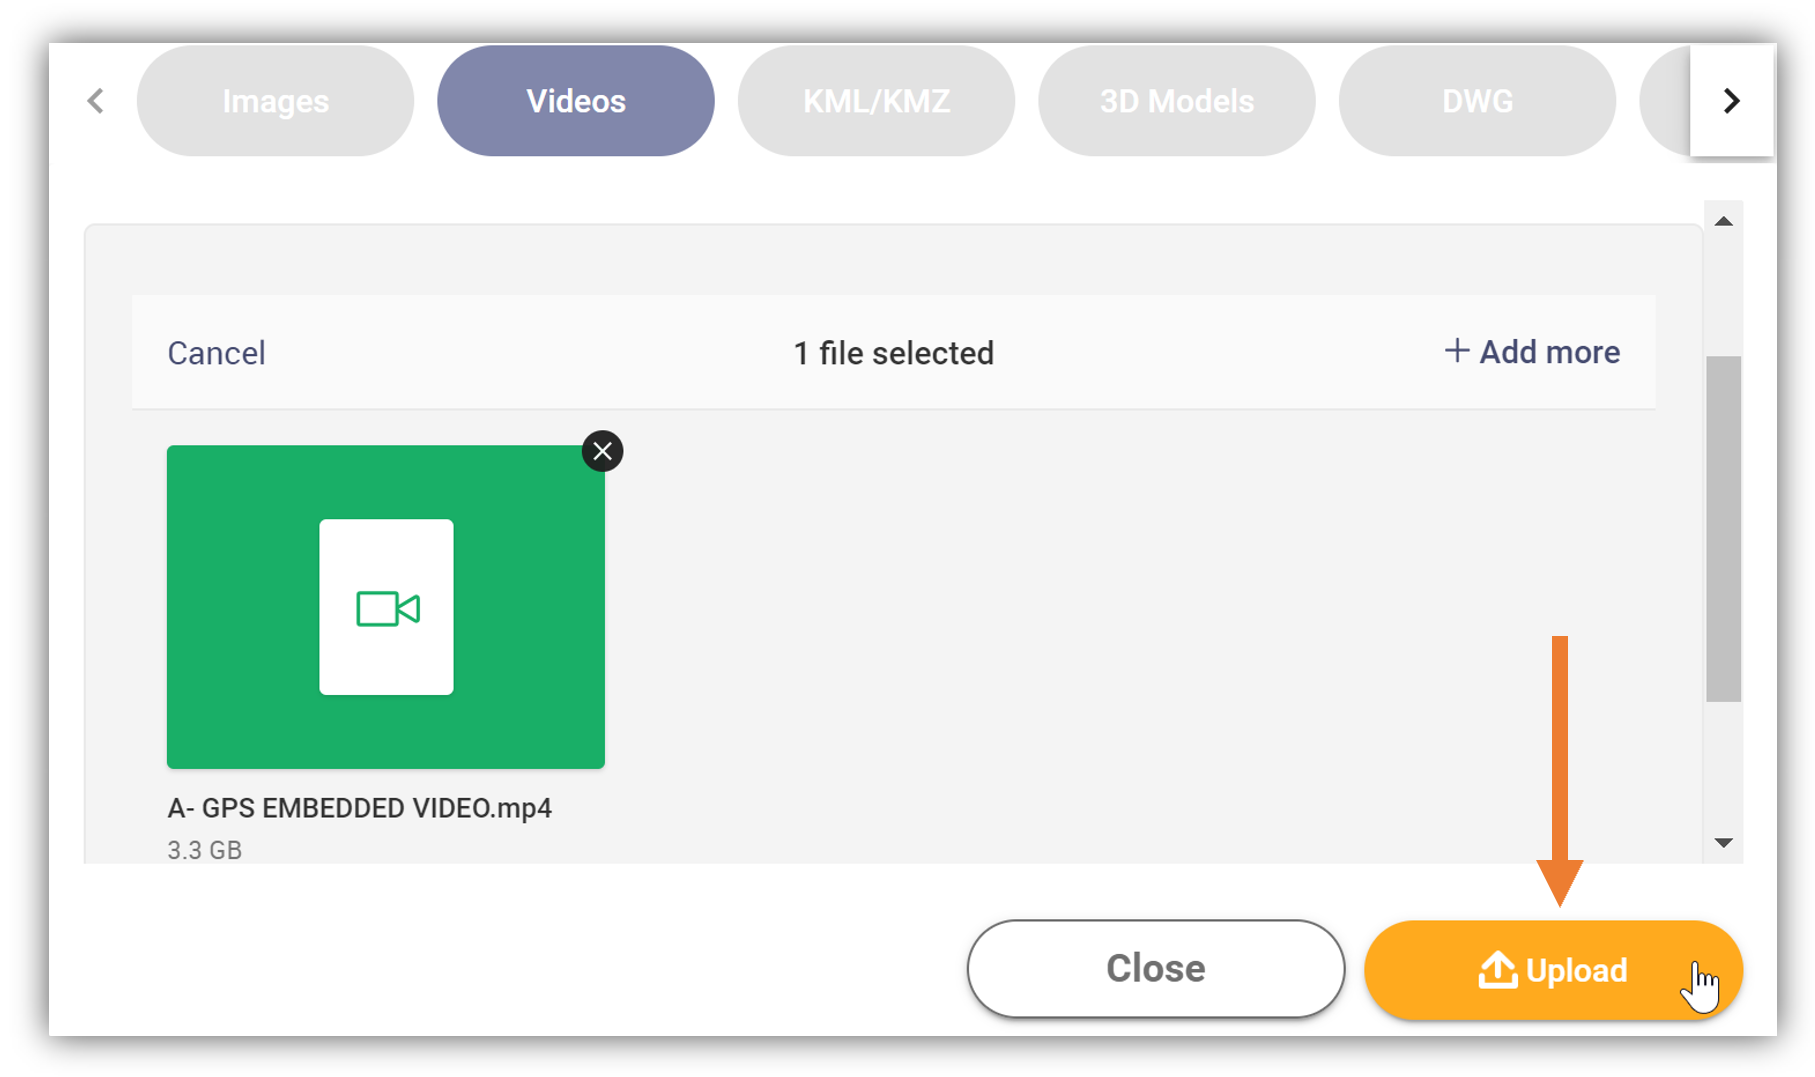
5. Once the video is uploaded, you can then rename it if needed.
6. After adding the video file(s) click the Upload button. The uploaded video file will appear under the folder and can now be viewed.
- Note: If your video has GPS metadata embedded in it, OcuMap will automatically parse it’s location on the map. If your video does not have GPS metadata, then you will need to upload a GPS file along with the .mp4 file. The GPS file can be in any of the following formats, GPX, SRT, TXT, CSV, XML. Please make sure your GPS file name is the same as your Video file name especially if you are uploading multiple videos at the same time.
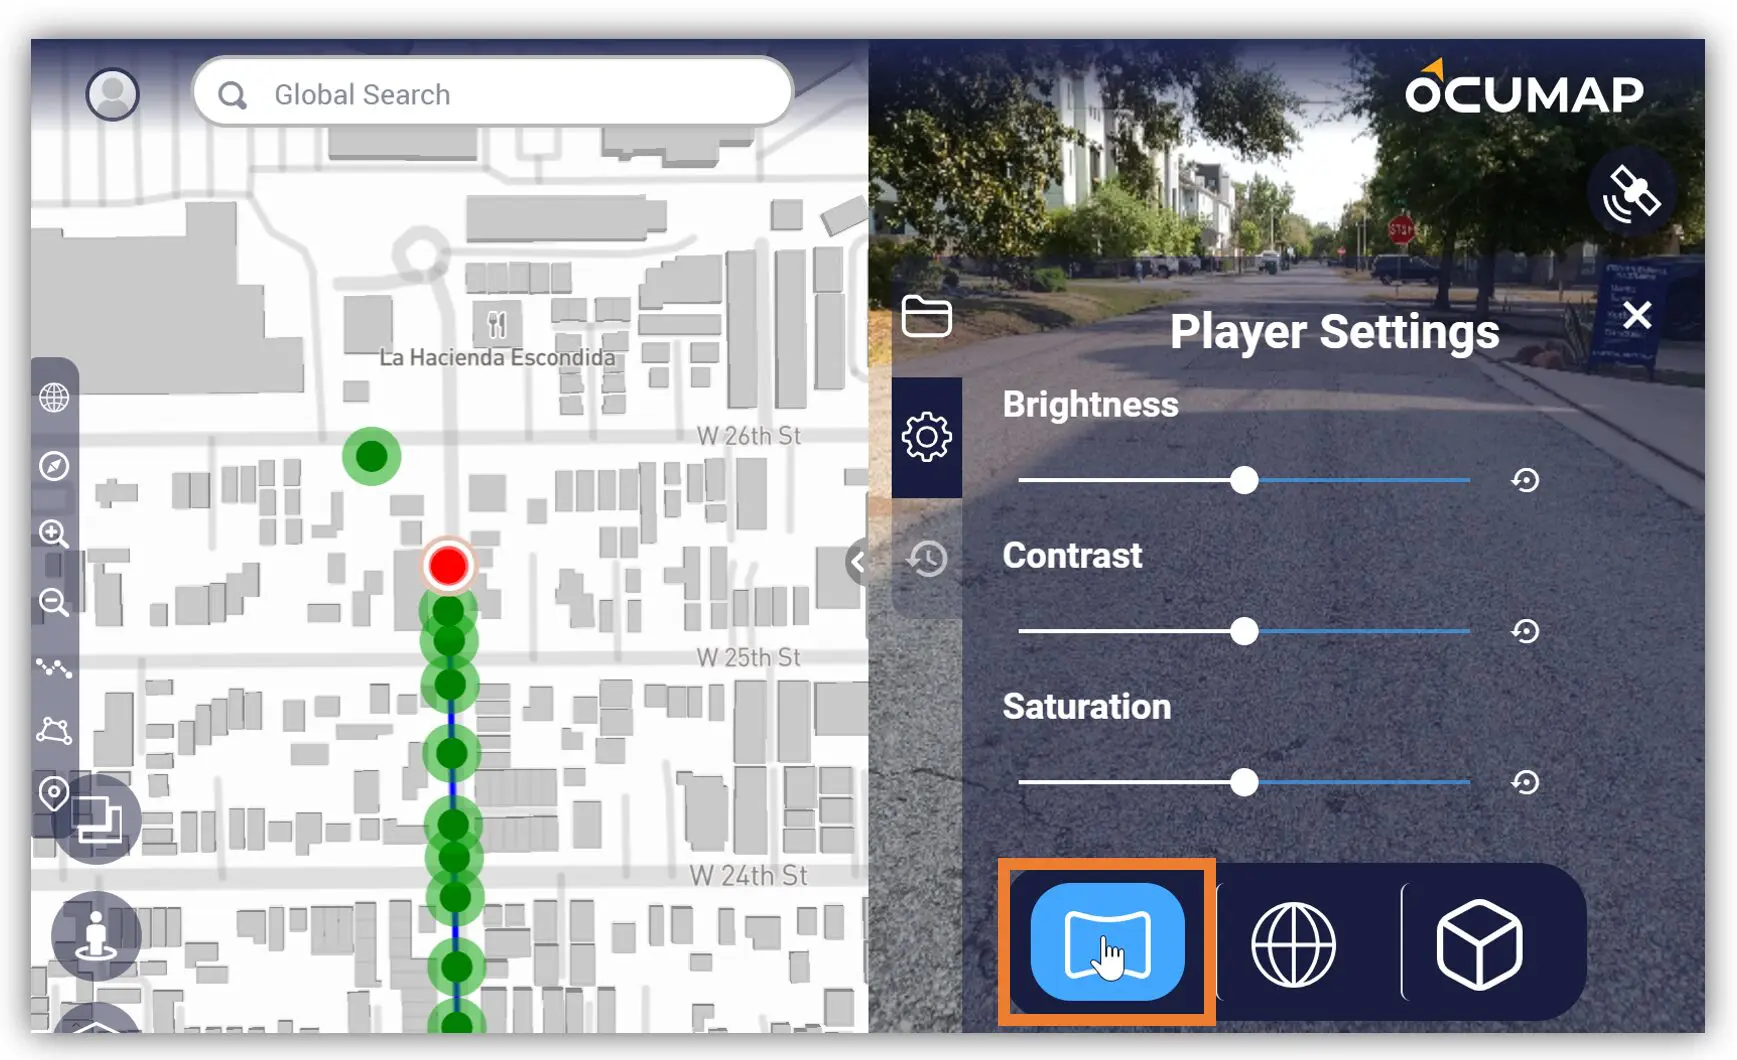
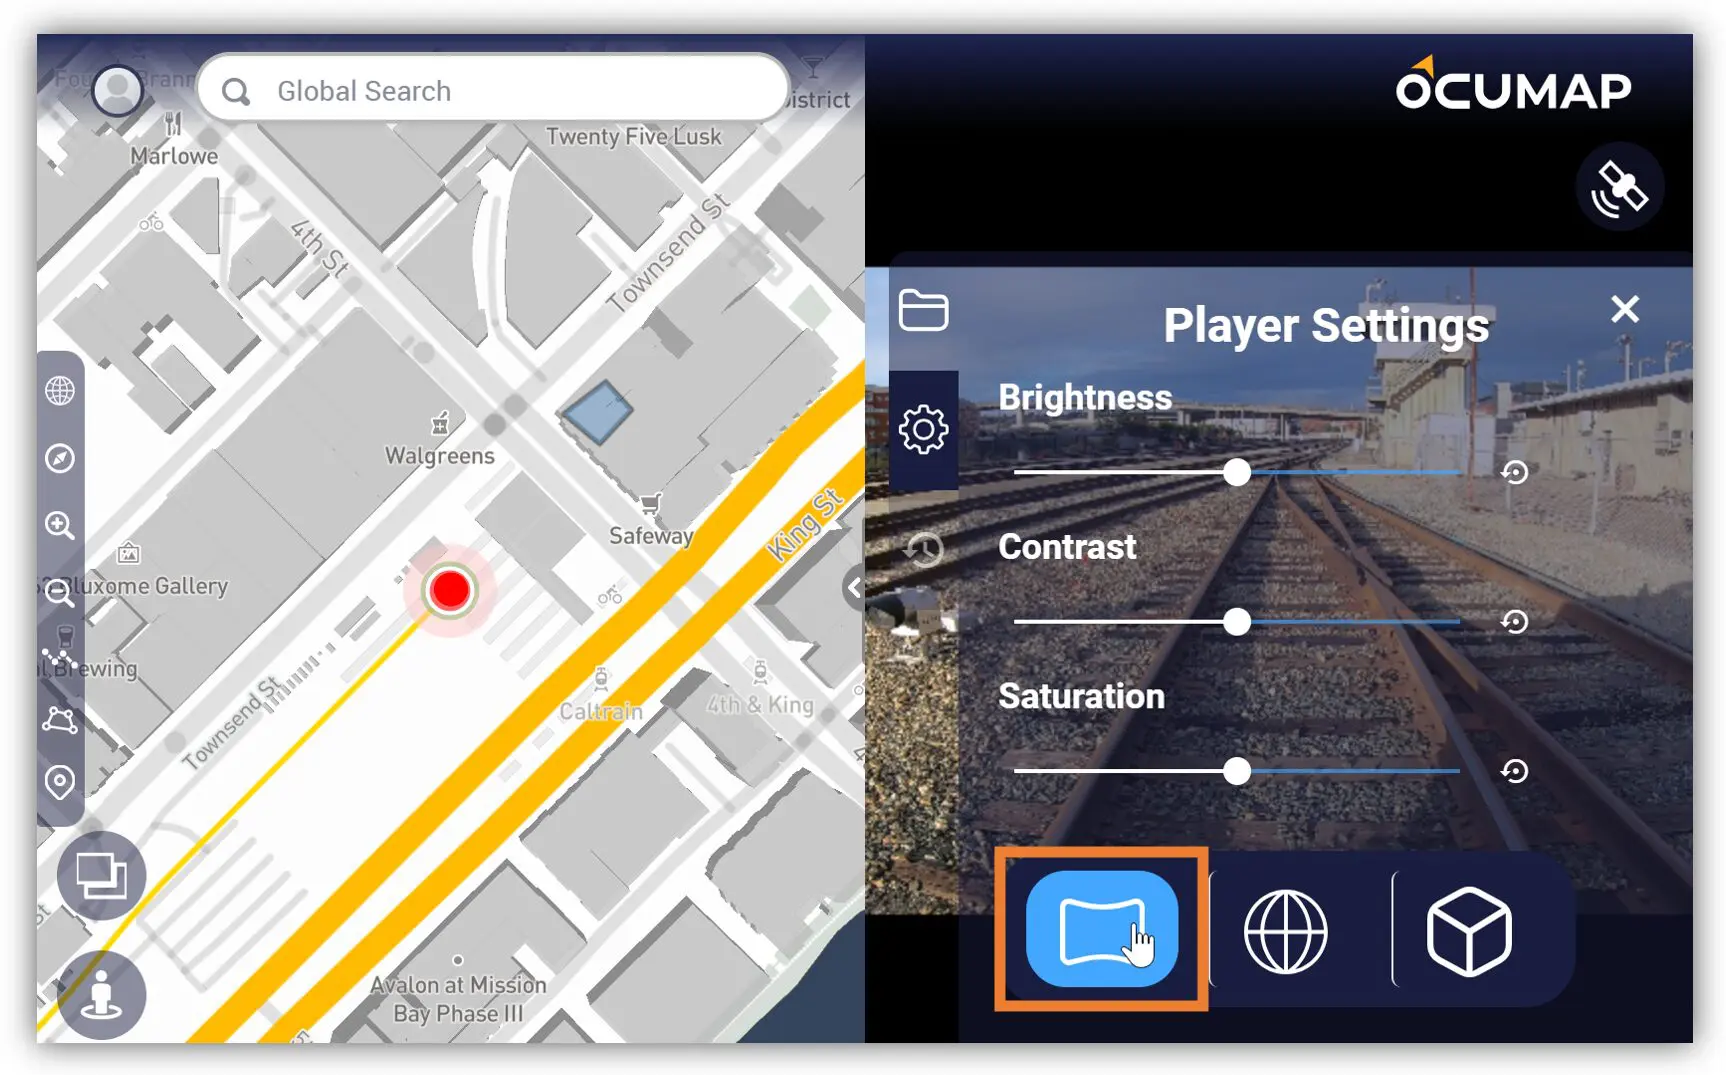
7. Once the video file(s) are uploaded, it will appear in the Viewer. Ensure that the Project View is appropriate to the uploaded file. In this example, we will use the Equirectangular project view.
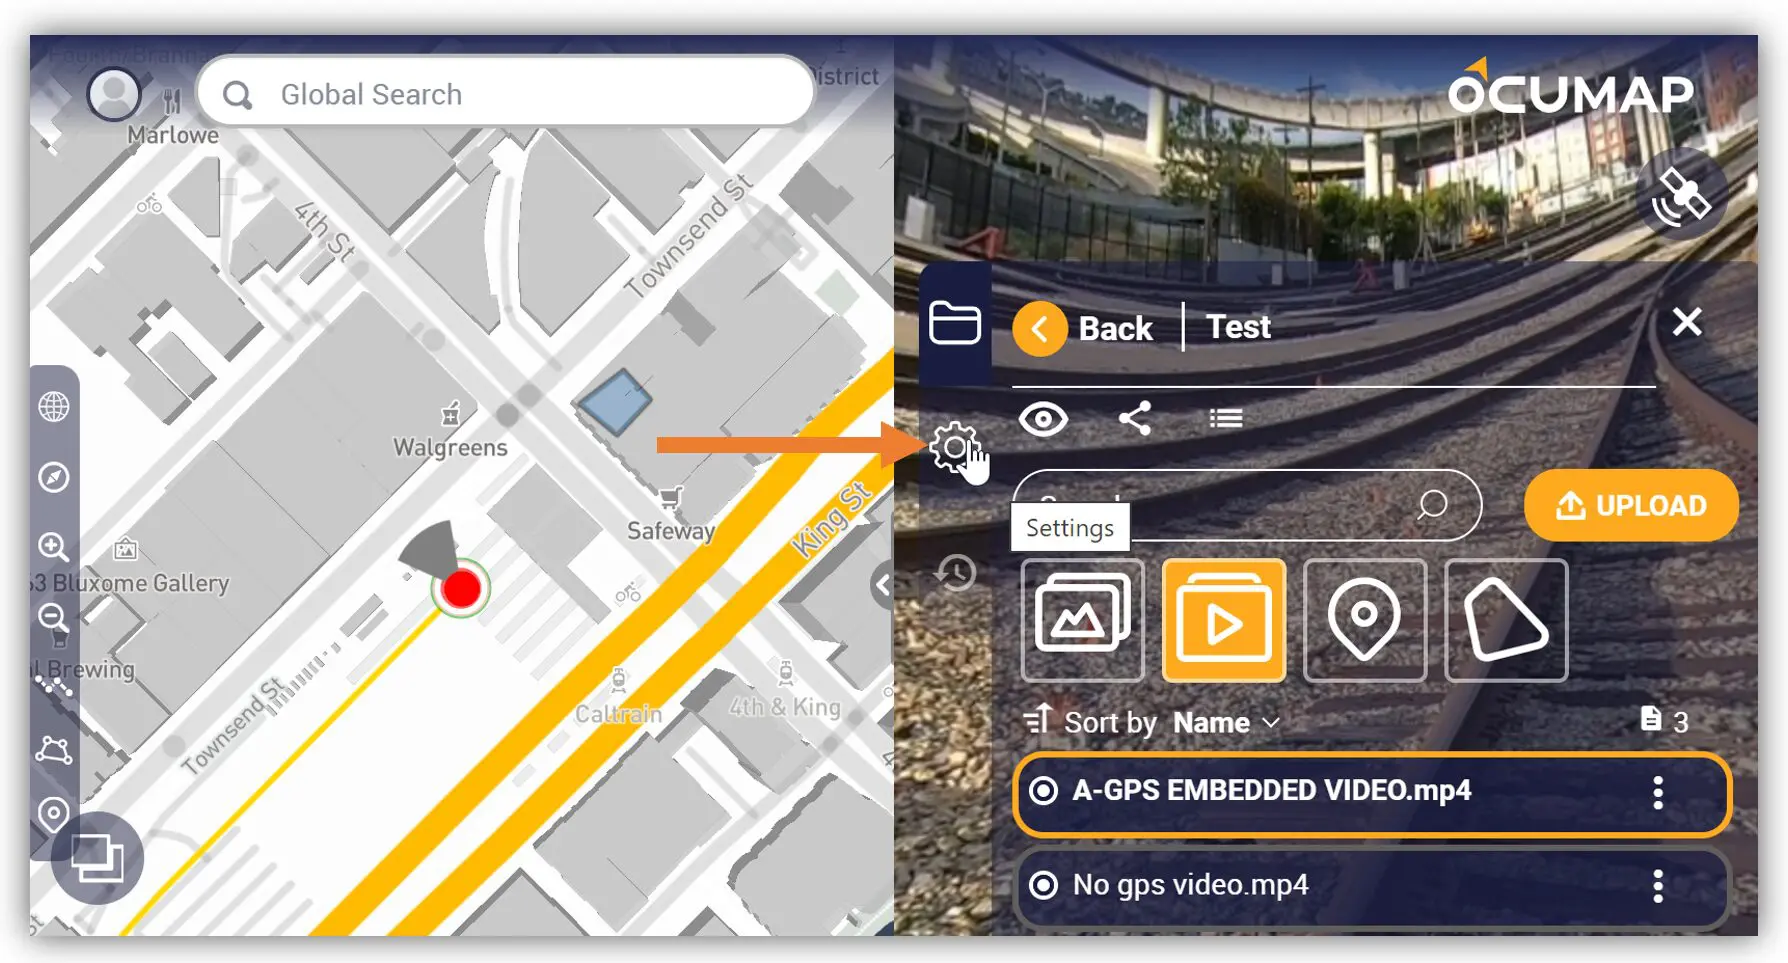
8. To set/update the project view, click the Settings tab. In the Project View section, select the Equirectangular icon. The settings will automatically be saved and updated in the project.
How to replace Video GPS data after upload
If for some reason you uploaded the wrong GPS file with your video, you can replace the uploaded GPS file by following these steps.
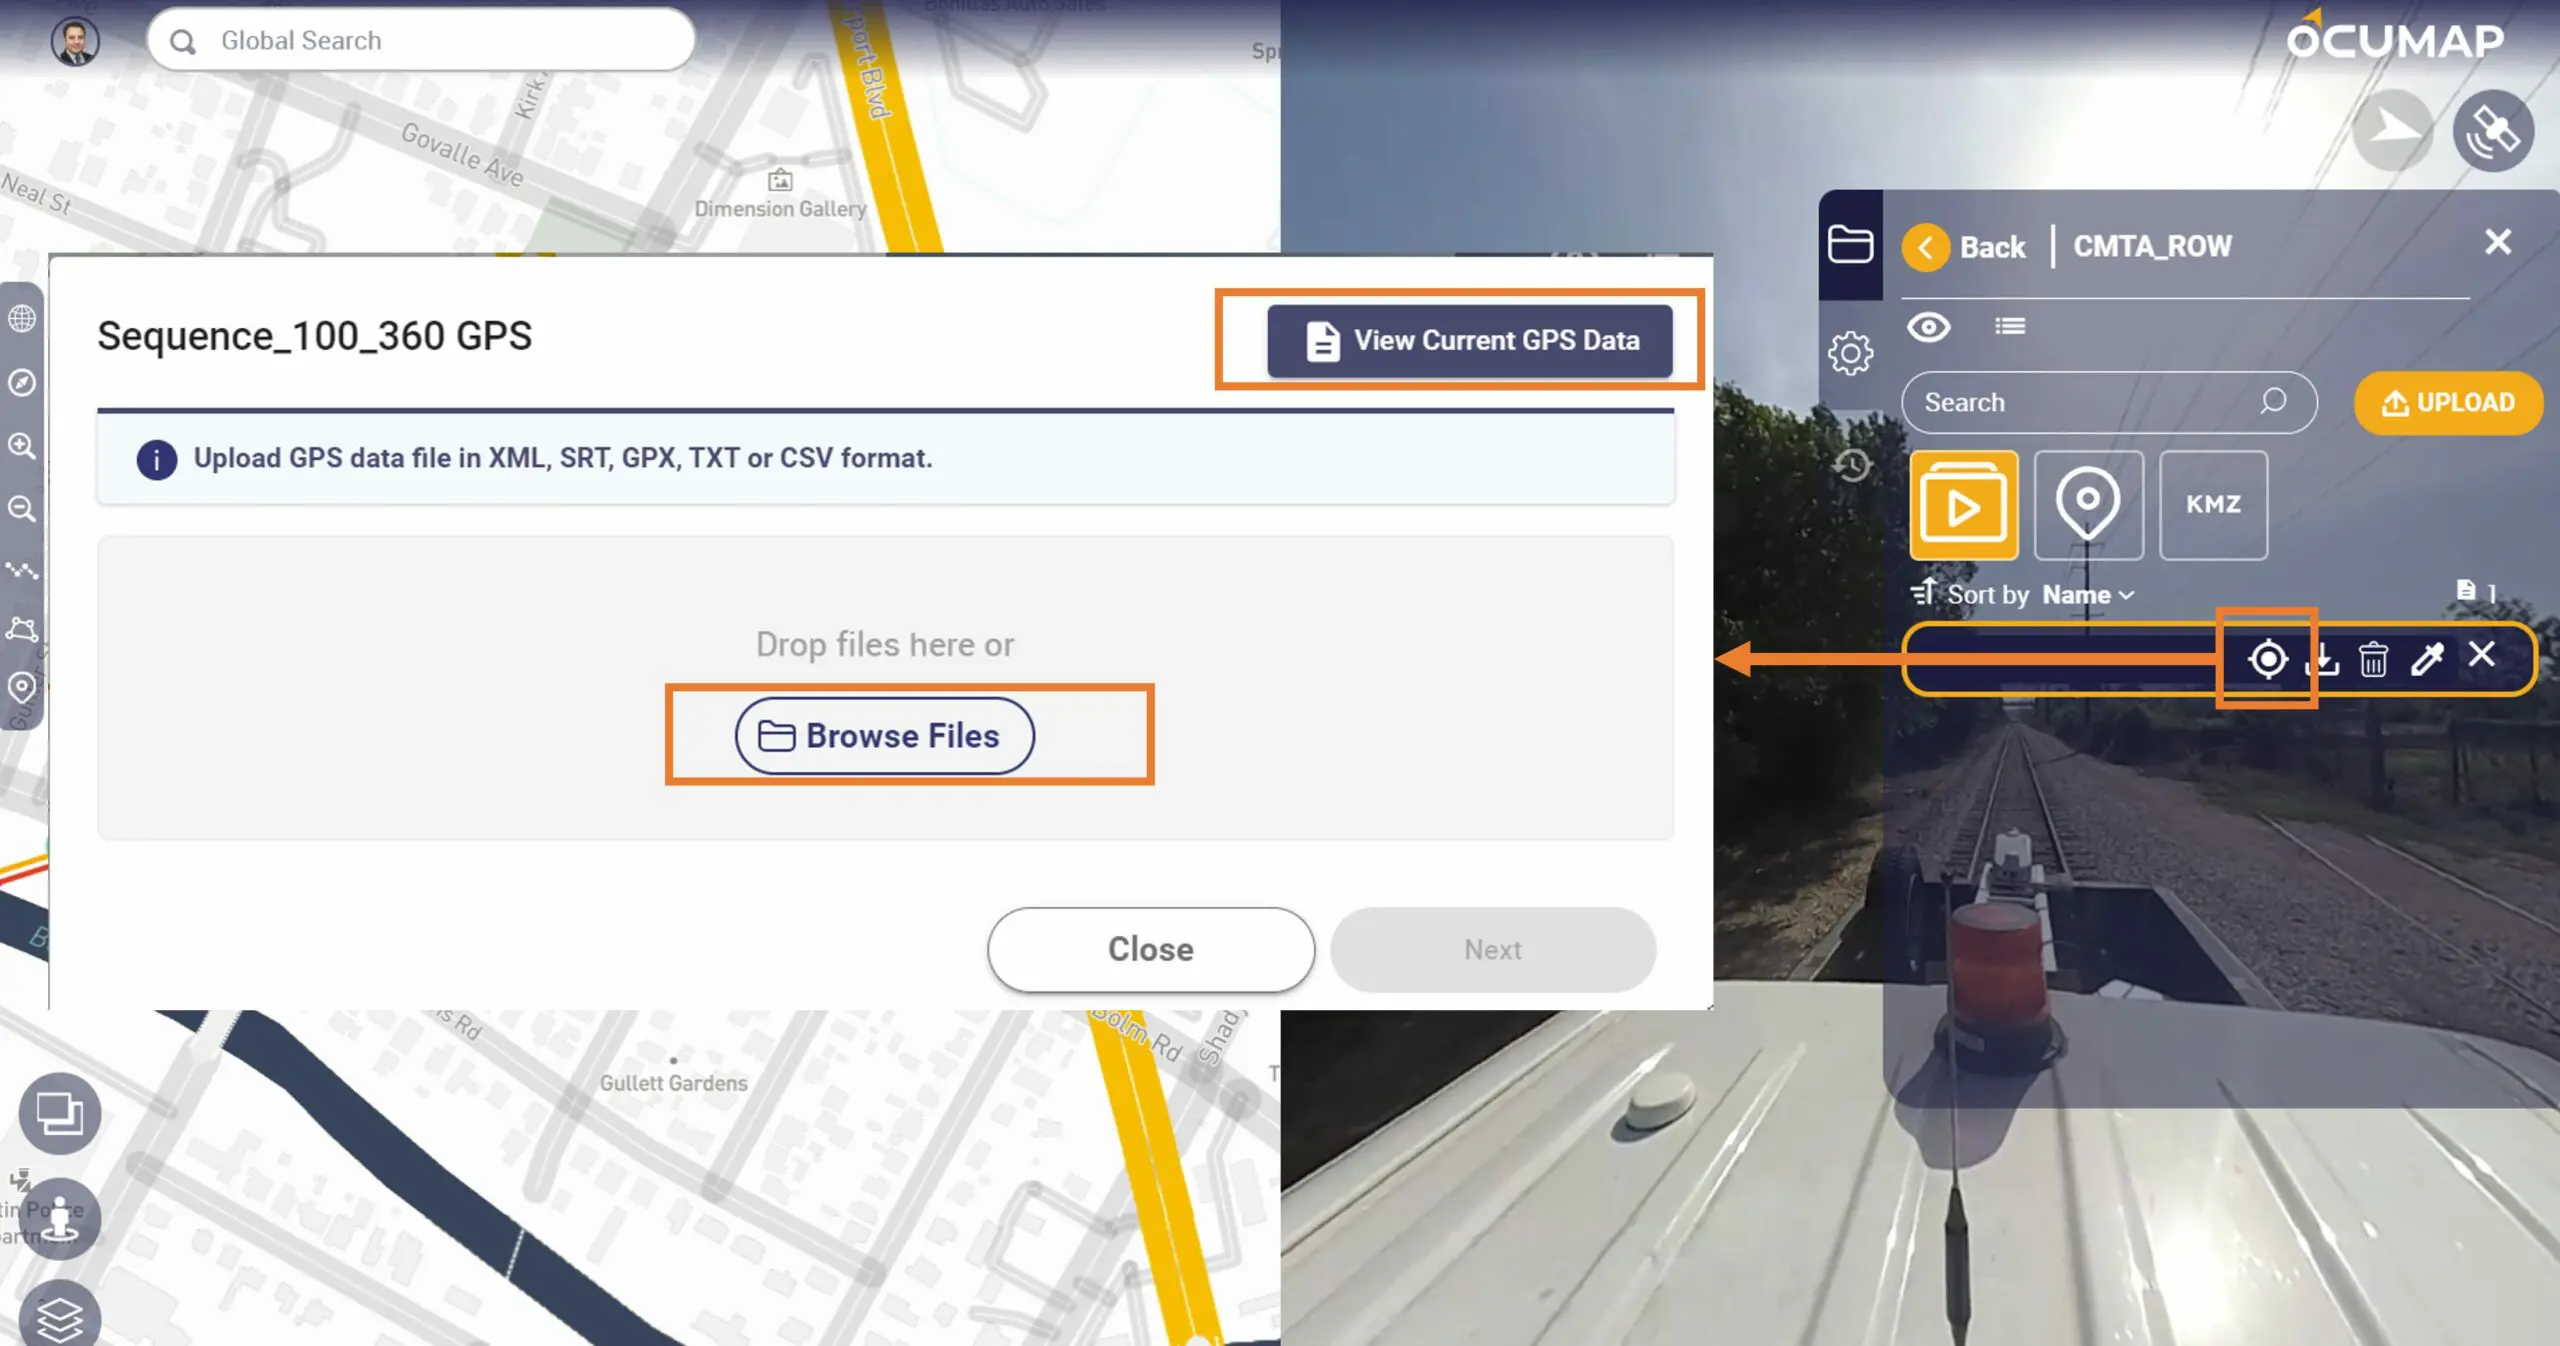
Select the video file from the panel, select the GPS icon as shown below, a popup will open, you have the option of viewing current GPS file or you can upload a new file to replace the existing one.
How to Check GPS Metadata
In this article, you will learn how to manually check if the GPS metadata is embedded into the image.
1. On your local device, find the image that you want to upload. Right-click on the image and select Properties.

2. The Properties window will appear, click the Details tab.
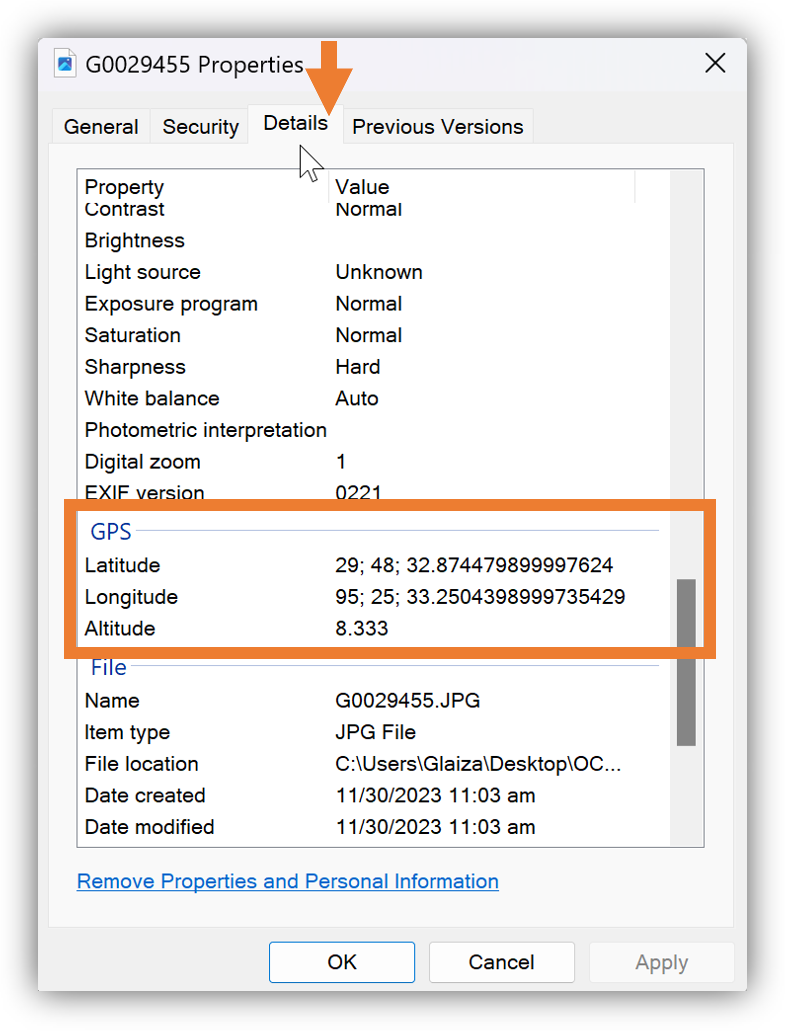
3. Scroll down to the GPS section. The Latitude, Longitude, and Altitude fields should display GPS values if it was activated when the image was taken.
Uploading Imagery with GPS
In this article, you will learn how to upload GPS-embedded images.
1. Open the Project where you want to add the GPS metadata-embedded image.
2. On the Project Menu, find and click the UPLOAD button. The Upload File window will appear, ensure that you are in the Images tab before uploading the image(s).
-
- Note: Ensure that you have verified the image contains GPS metadata before uploading. See How to Check GPS Metadata.
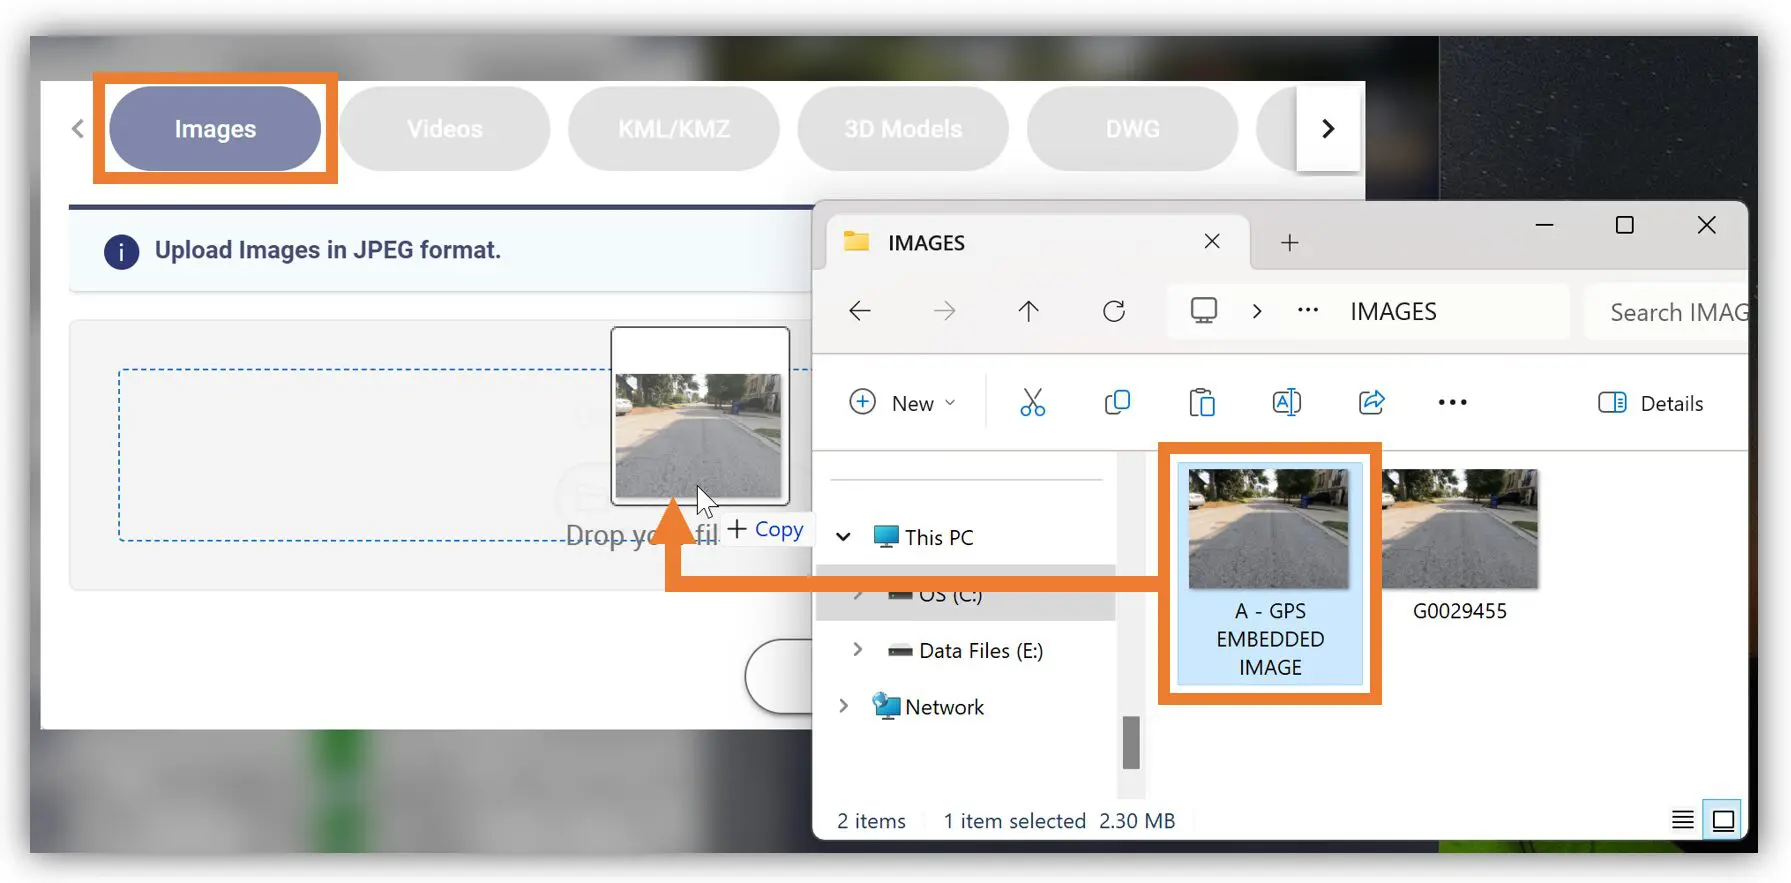
3. You can use the Browse Files button to manually select the image file or Drag and Drop the image file(s) in the Image section.
-
- Note: You can add multiple image file(s) by dragging and dropping them in the image section.
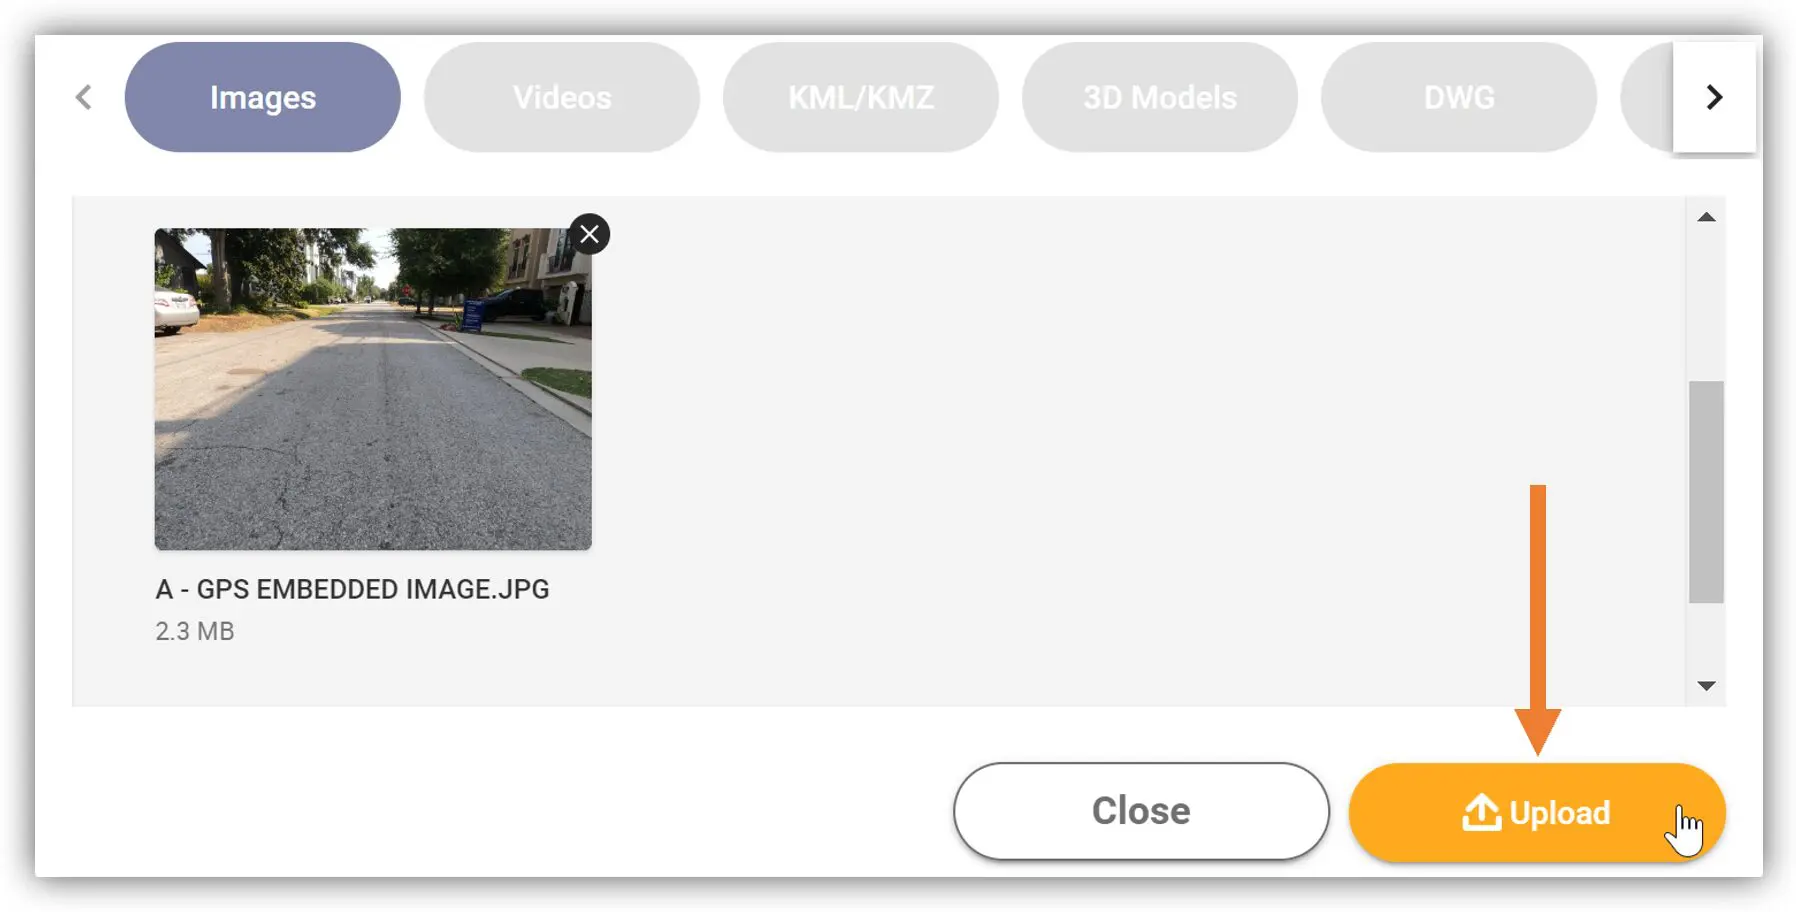
4. Once the image is uploaded, you can then rename it if needed.
5. After adding the image file(s) click the Upload button. The uploaded image file will appear under the folder and can now be viewed.
6. Once the image file(s) are uploaded, it will appear in the Viewer. Ensure that the Project View is appropriate to the uploaded file. In this example, we will use the Equirectangular project view.
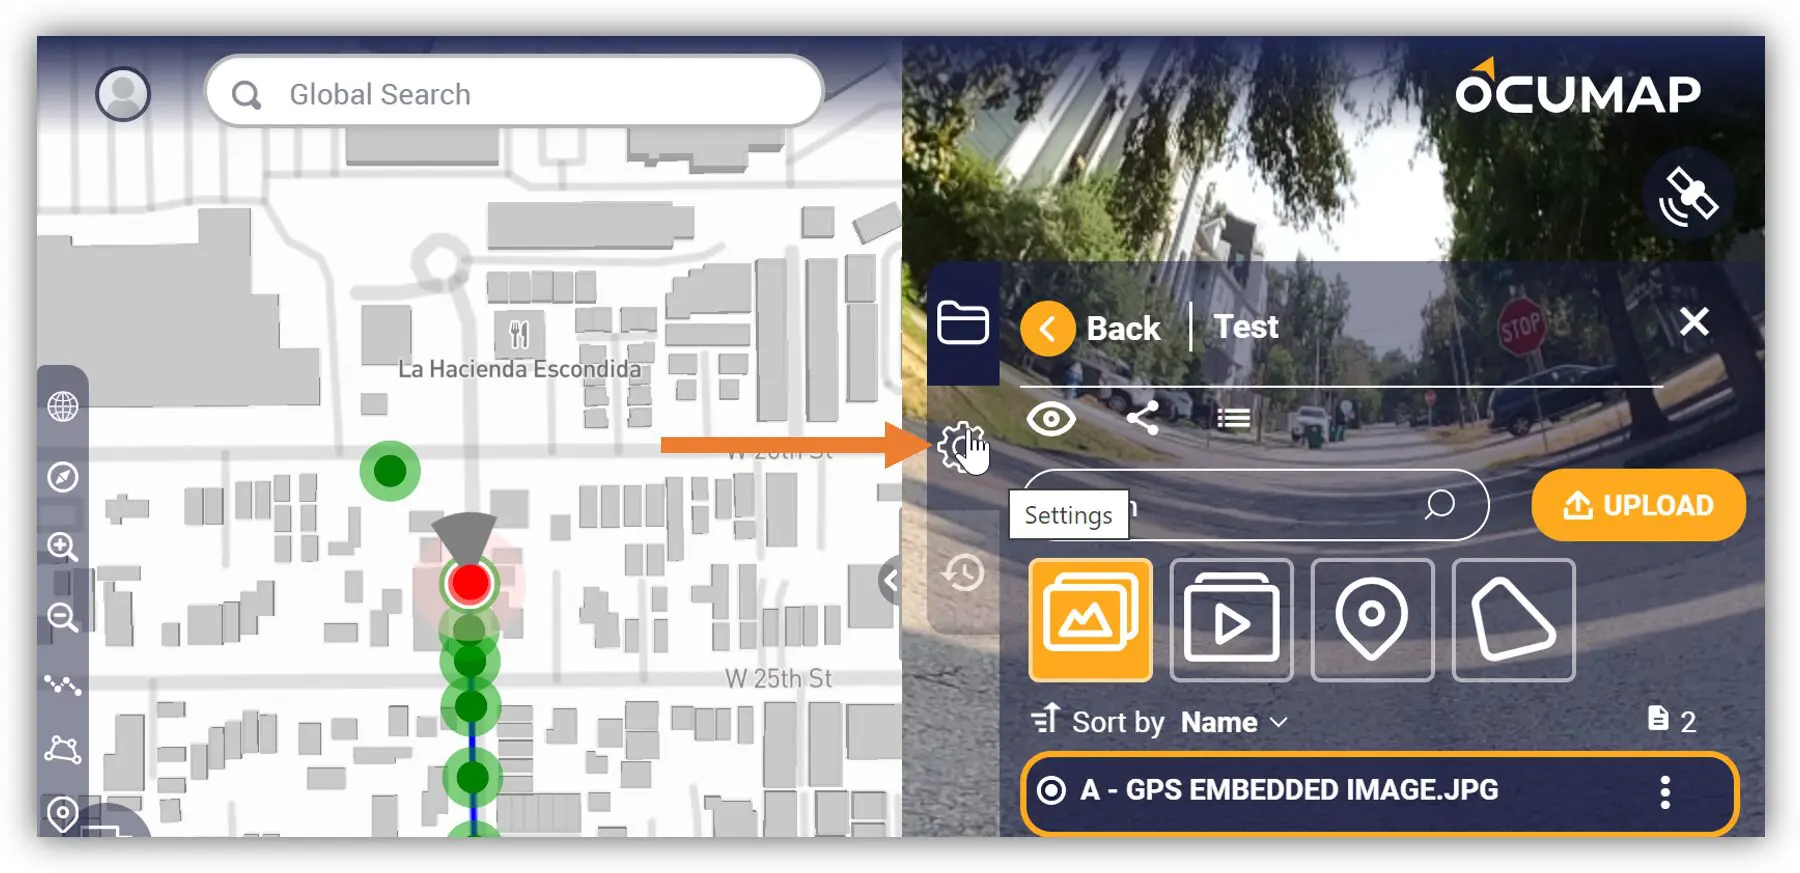
7. To set/update the project view, click the Settings tab. In the Project View section, select the Equirectangular icon. The settings will automatically be saved and updated in the project.