Searching and sorting files can be done in the Projects panel’s Search field. It is important to note that you need to select a project first to access the filters such as view layers and file managers option, and the Search field.
Searching and Sorting Files
View Layer Icon
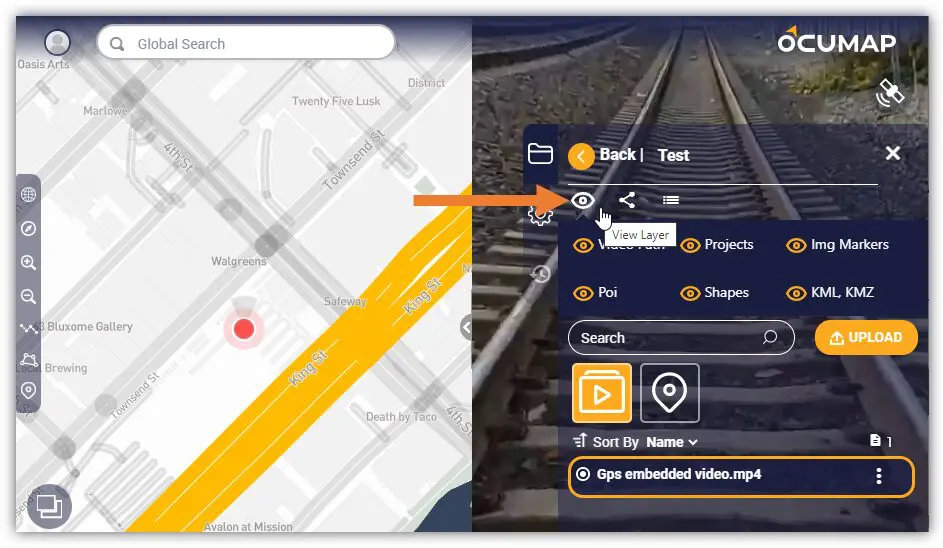
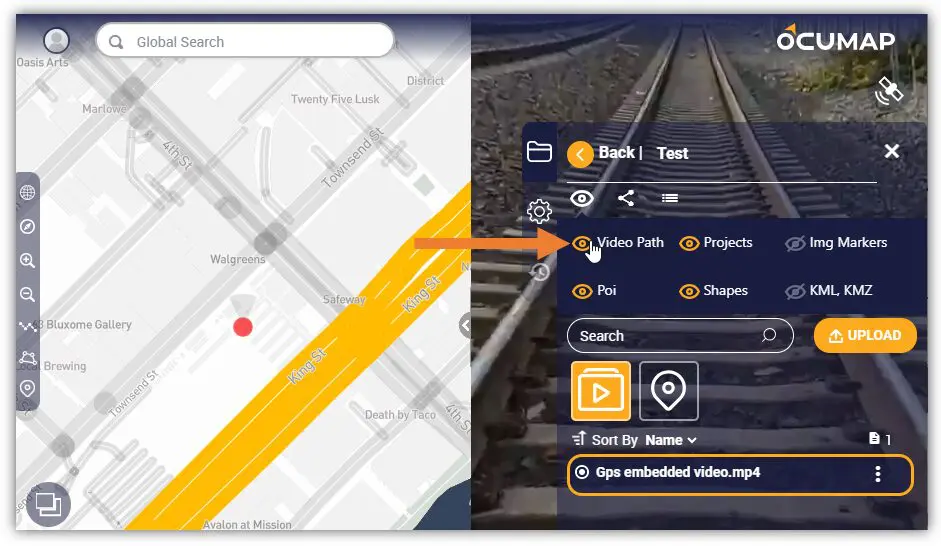
The View Layer option lets you filter displayed items by enabling/disabling them. To do this, follow the steps below:
1. Open a Project, find, and click the View Layers icon.
2. To enable a layer, click the Eye icon beside a layer. Enabled layers will have an Orange icon, and disabled layers will have a Gray one.
File Manager Icon
The File Manager option lets you access files and allows you to access them from the project directly. Standard POI, Shapes, and Search fields are also available for your convenience. To open the Project File Manager window, follow the steps below:
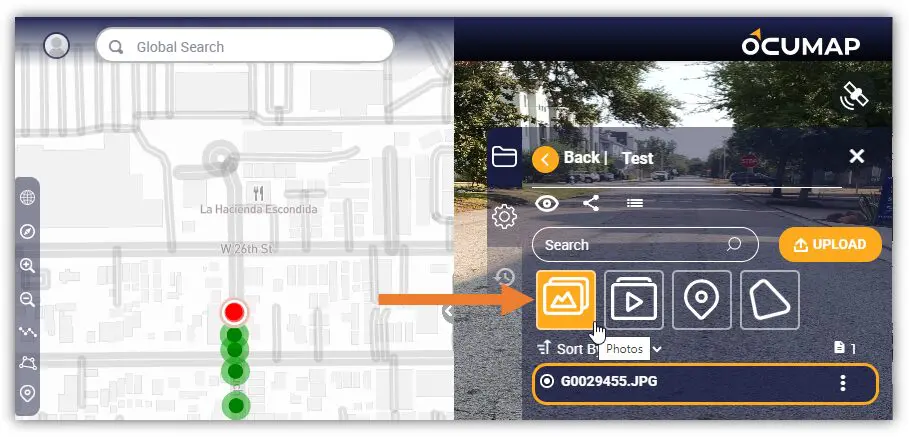
1. Open a Project and select a folder by selecting the appropriate icon:
-
- To open the videos folder, click the Video icon.
- To open the images folder, click the Photos icon.
- To display all POIs, click the POI icon.
- To display all shapes, click the Shapes icon.
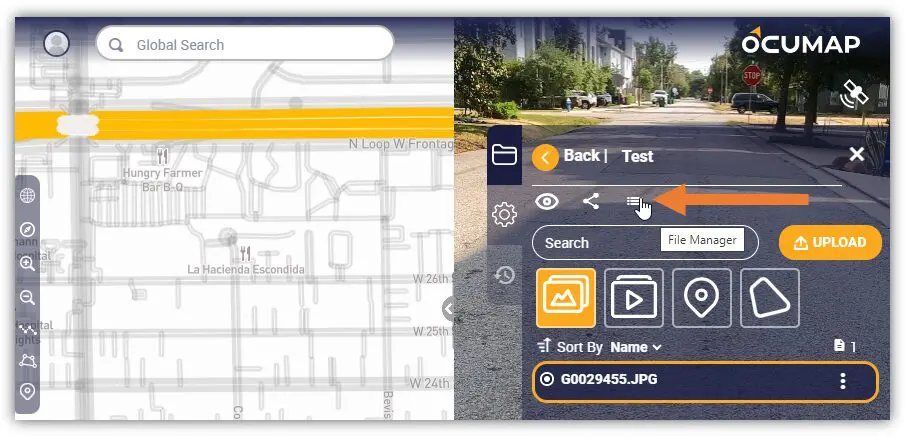
2. Click the File Manager icon.
3. The selected project’s File Manager window will appear. This window lets you edit the Project Name and Address by clicking the Edit (Pencil) icon beside the project name. You can also use the Filters to display filtered values or the Search Bar to narrow your search.
4. The Project File Manager window displays all the project files based on the selected filter. The table below displays the details including
-
- File Name
- Latitude
- Longitude
- Altitude
- Sequence Group
- Position
- Size
5. These are the following operations that you can do within the project File Manager window under the Action column:
-
- Edit File
- View File Information
- Download File
Search Field
The Search field lets you search Photos, Videos, POIs, 3D Models, KML/KMZ Files, and shapes within the selected project. To easily search for POIs or shapes, follow the steps below:
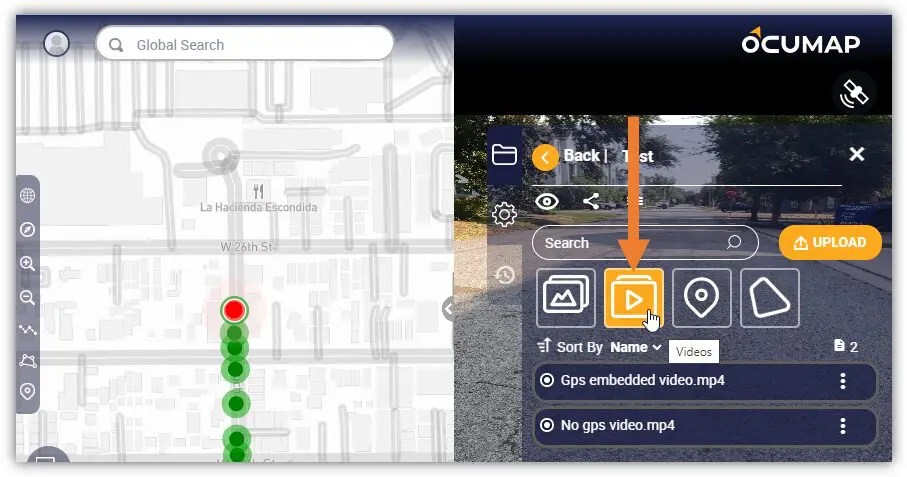
1. Open a Project, find, and select the appropriate search type by clicking the appropriate folder. In this example, we will use the Videos folder and search for a specific video.
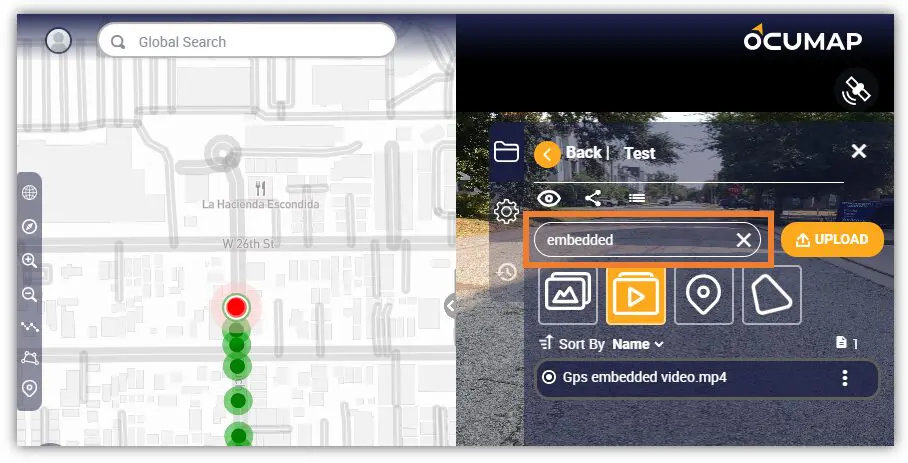
2. In the Search field, enter the relevant keyword(s). As you enter the keyword(s), the relevant search results will appear in the list below.
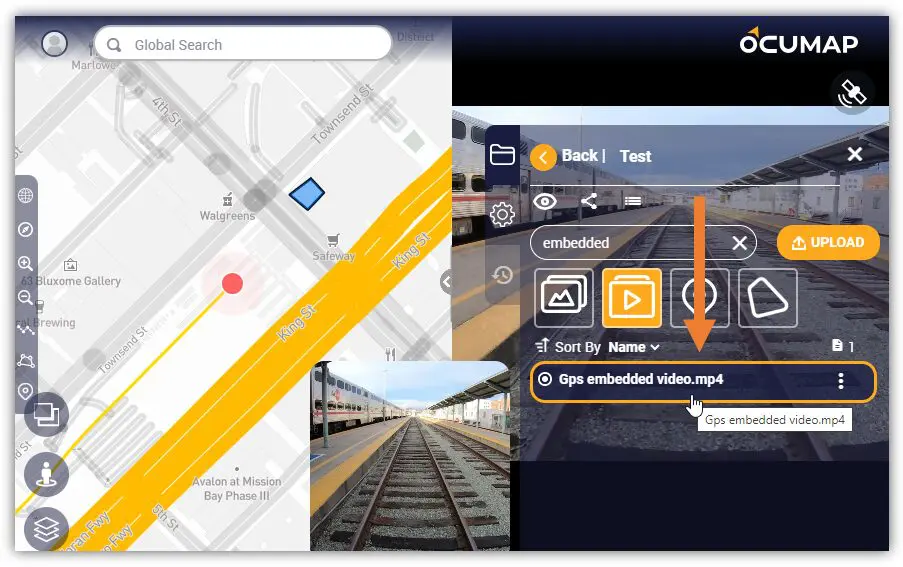
3. Click one of the videos in the list below to select. Once you select the video, OcuMap will automatically direct you to the Base Map and the video will appear in the Viewer.
Sorting Files
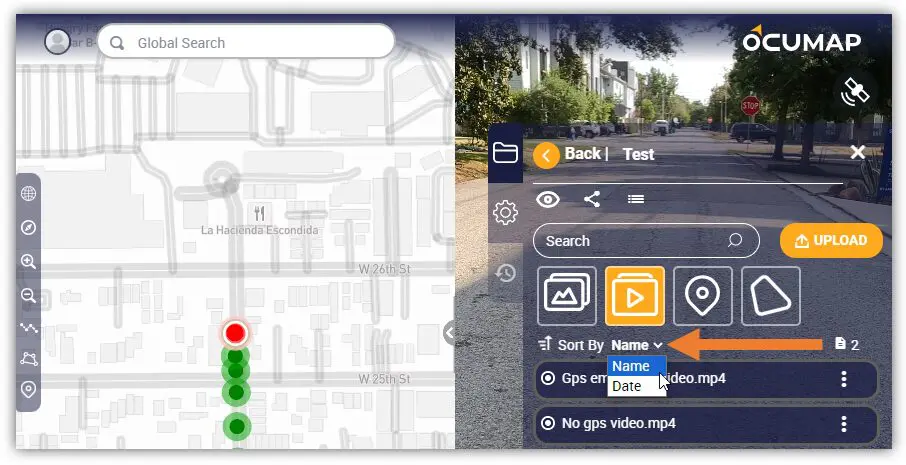
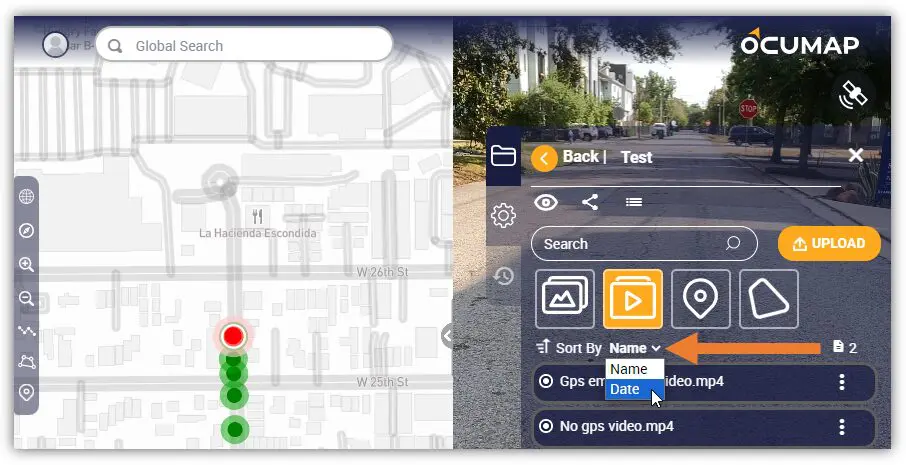
OcuMap lets you sort files in ascending or descending order and in combination with the Name or Date options.
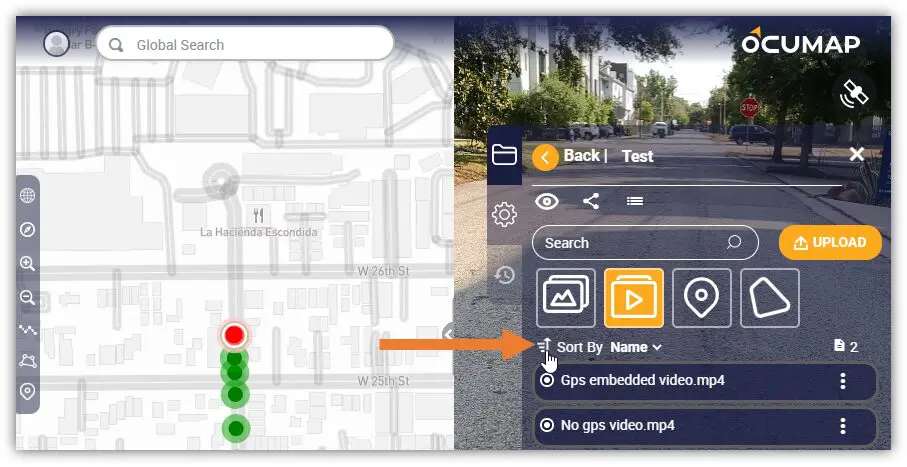
To use the ascending/descending order, click the Ascending/Descending icon and choose the type of filter you want to use.
Sort By Name
1. Open a Project and select the appropriate File Folder.
2. To change the order of the files, you can click the Ascending/Descending icon.
3. In the Sort By section, click the Drop-down arrow and select Name.
After selecting the Name option, the files will be arranged alphabetically. Depending on the selected Ascending/Descending order, the files may be arranged from A to Z or Z to A.
Sort By Date
1. Open a Project and select the appropriate File Folder.
2. To change the order of the files, you can click the Ascending/Descending icon.
3. In the Sort By section, click the Drop-down arrow and select Date.
4. After selecting the Date option, the files will be arranged chronologically. Depending on the selected Ascending/Descending order, the files may be arranged from oldest to newest.
