Are you a rail engineers or a maintenance manager? if yes, then you probably know that inspecting a busy corridor could be time consuming and dangerous at times, but depending on the type of operation you are involved in, you might be looking for different assets to inspect. While some of these assets will require physical presence on-site, the majority of them can now be visually inspected from your office but how? The answer is fairly simple, have you ever used google streetview to look at the picture of your destination? You can use the exact technology to see all of the above ground assets within your right of way but how can you get that 360 degree view?
Collecting 360 video of your Right of Way
You can do the data collection yourself using off the shelf GPS cameras or hire a mapping company to do the job for you. Here are the steps to doing it yourself.
1- Decide on the Type of camera you will be using.
2- Decide on the level of positional accuracy you require
3- Decide on the final format of the data and how you will get the most out of it.
Let’s take a deeper dive:
1. Type of 360 Video Camera
While there are multiple options available in the market, there are only a few cameras that can fit the bill when it comes to mapping. These cameras include:
-Flir, LadyBug 5+ camera system which can connect to precision GPS for enhanced accuracy. This camera system provides a wide field of view with 8k resolution at 30 frames per second or 4k resolution at 60 frames per second. The LadyBug system can export mp4 video files with GPS or geotagged JPEG panoramic imagery.
–NcTech Imaging-Pulsar+ : Has a built-in GPS receiver U-BLOX Neo M8N and can capture 60.5MP (11000×5500) panoramic imagery at 7 frames per second.
-Insta360 Pro 2: Capable of producing 4K video at 30 frames per second and panoramic imagery at 12K. This camera has a built-in GPS module but will require a more accurate GPS before it can be utilized in mapping.
2. Level of Positional Accuracy Required
If the purpose of your inspection is only visual, you may be ok with sub-meter positional accuracy; however, if your inspection requires locating assets with centimeter level accuracy, then you will require a more advanced GNSS/GPS. Deciding the level of accuracy upfront will help you decide on which system is best used for 360 video mapping.
3. Data format
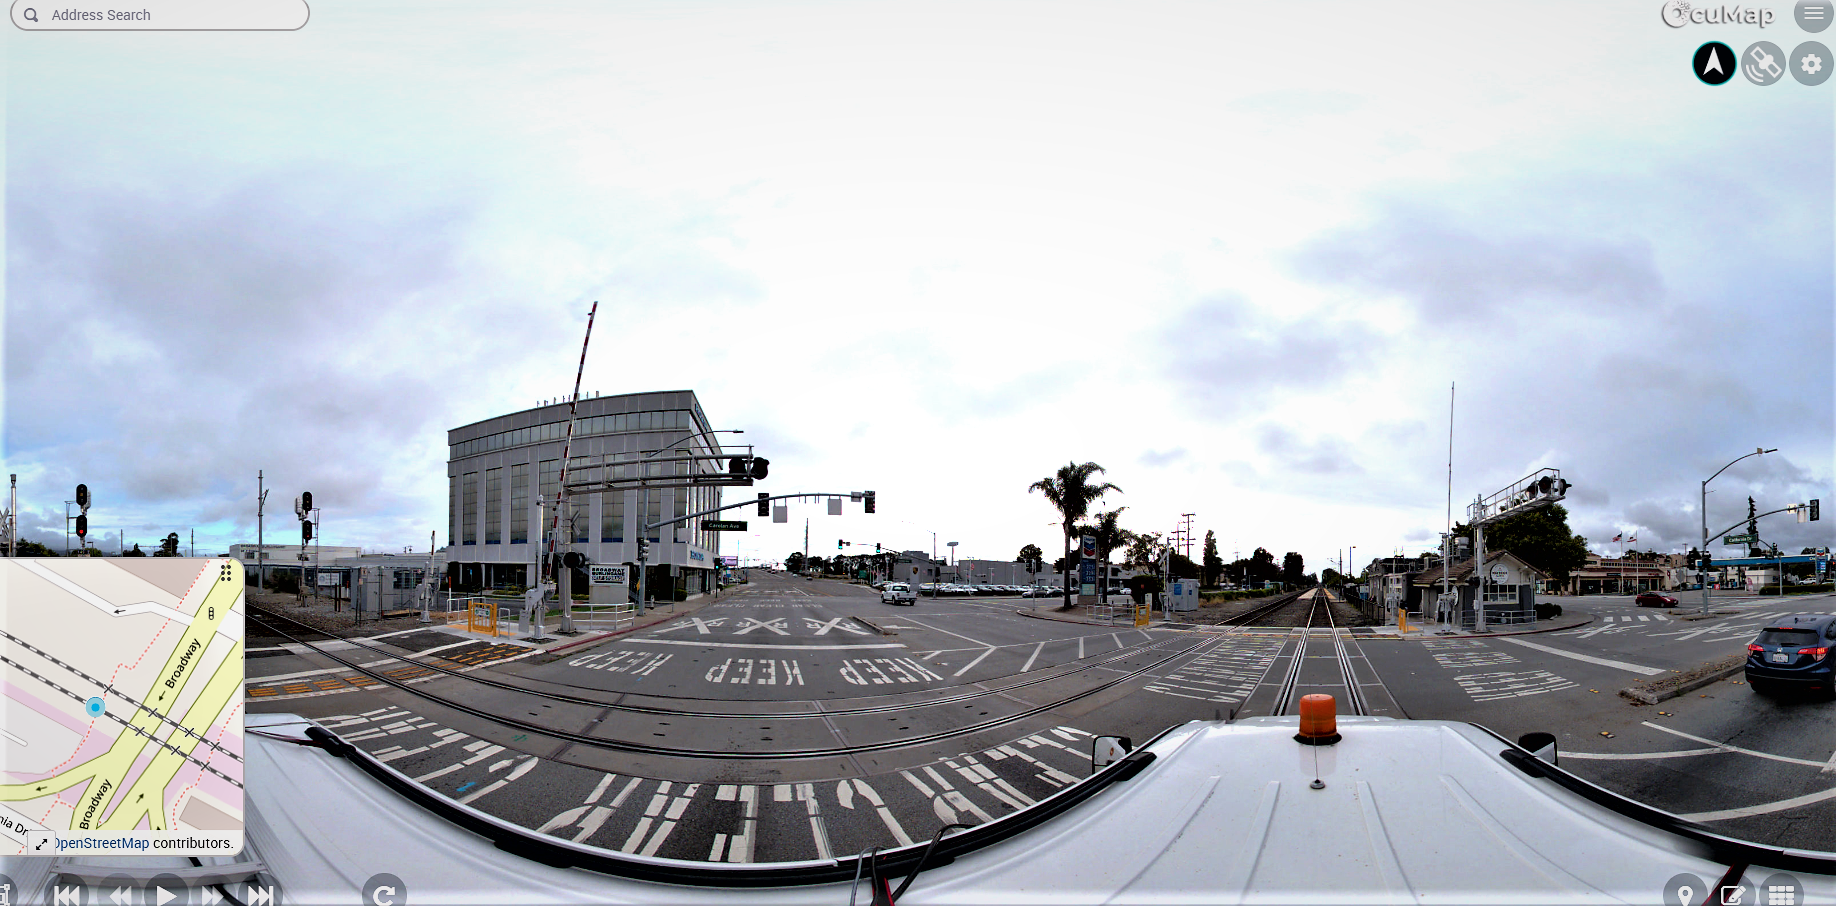
We tend to think of images and videos as mp4 and jpeg files only however, when we are considering mapping applications, you need to consider how this data will be used by your organization, for example, if you are extracting point features from the GPS video, you would need to understand if your GIS team will need access to this data and how they are going to use it. If you are only doing visual inspection, you will need to think about the GPS files and to connect your video to the map. One solution that can help you overcome many of these challenges is OcuMap, where you can manage all of your 360 videos and panoramic GPS data in one location. It is also GIS compatible so your GIS team would be happy with it.
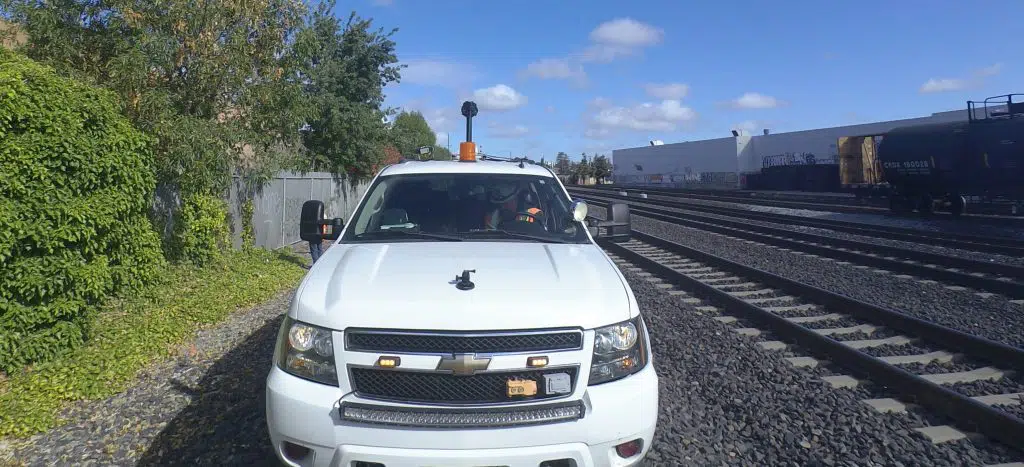
Mounting the Camera on a Hi-Rail vehicle
Right of Way mapping is best done at speed. When we talk about 7 frames per second-imagery, that means you are able to capture one image per second, so if you are travelling at 40 miles per hour, you can still get an image every 5 meters. This can also be determined in the settings of each camera pre-collection. H-rail engineers is recommended for multiple reasons including:
1- It is easier to mount a GPS camera system on the rooftop of a hi-rail truck or SUV.
2- Some locations along the right of way may require stopping, you may run into data storage issue, camera power supply issue, GPS signal issue, etc. if you are using the Hi-rail, you can stop and fix the issue while you are out there instead of waiting for the railcar or train to come back
Uploading your Data to OcuMap
Depending on the type of camera you used to collect your 360 degree imagery, the resulting data format may include panoramic imagery in JPEG, mp4, GPX, CSV, TXT, XML. You can login to OcuMap, create a project folder, then drag and drop your data. JPEG imagery will be displayed on the map and you can select the image you want to see directly from the map.
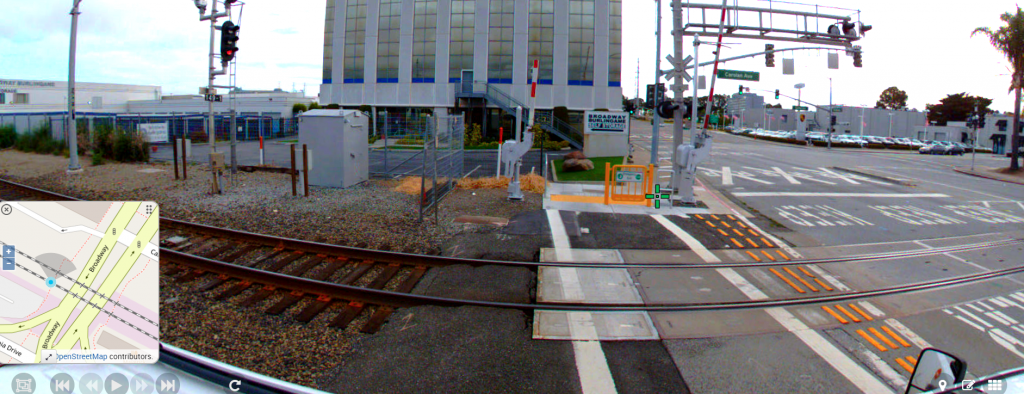
Locating your Above Ground Assets
Once the panoramic imagery is uploaded and displayed on the map, you can now easily locate your above ground assets directly from inside the images, this is also known as feature extraction. The steps are as follows:
1- Select the image where the asset is located
2- Click on the Add Hotspot icon
3- Crosshair appears, select the feature you are interested in locating
4- Label the feature based on your own naming convention, click save.
The steps above can be repeated for every visible feature in an image or a video.
While this guide does not require a rail engineers to implement it, you can see how it will help you streamline asset mapping. Congratulations, you have now successfully located all above ground assets from your office.